Adobe Acrobat Pro: Make PDFs accessible
Last Modified on 11/06/2025 12:47 pm EST
Use Adobe Acrobat's Accessibility Checker to create PDFs that satisfy baseline accessibility requirements.
Before you start, you will need:
- Adobe Acrobat Pro, an app in Adobe Creative Cloud (not the same as the free Adobe Reader)
- A PDF file. For best results:
- If your PDF is a scan, make sure it is a clean, high-quality scan.
- If you created the PDF in a Microsoft Office application (such as Word), use Microsoft's Accessibility Checker to make it accessible in that program. Leave it in the native format (.docx, .pptx) for greatest accessibility. If you must share as a PDF, be sure to use File > Save as… to save a copy as a PDF that preserves the accessibility features. Do not print to PDF, as this creates an image that isn't accessible!
Step 1: Run Accessibility Check
- Open Adobe Acrobat.
- Open the document you want to make accessible.
- Click the Tools menu, then choose Accessibility.
- Click Accessibility Check in the Tools sidebar pane on the right.
- Click Start Checking.
Step 2: Fix issues
When the Accessibility Check is complete, results will be displayed in a sidebar panel. If you close this panel, the Accessibility Checker icon next to the panel reopens it.
- Click a category (Document, Alternative Text, etc.) to expand it and view any issues.
- A few issues will always be marked Needs manual check:
- Logical Reading Order. A human needs to verify that the document is “tagged” so that assistive technologies read or present page elements in the appropriate order. See the next section, Manually check for logical reading order.
- Color contrast. A human needs to verify that there is enough contrast between text and background for the text to be legible. Black text on a white background is always legible; for other color combinations, use WebAIM’s Contrast Checker.
- Navigation links. A human needs to check that the hyperlink listed work and open the correct webpages.
- For items marked Failed:
- Right-click (Windows) or Ctrl-click (Mac) on the item.
- Click Fix, if available.
- If Fix is not an option:
- Click Explain
- Follow the onscreen instructions.
- Reopen the Accessibility Checker results.
- Right-click/Ctrl-click the Failed item, and choose Check again.
Step 3: Manually check for logical reading order
Adobe Acrobat's AI algorithms analyze the document structure to determine reading order, but a human must check it and fix mistakes. This section summarizes the process, see Adobe’s Reading Order Tool for PDFs documentation for more detailed guidance.
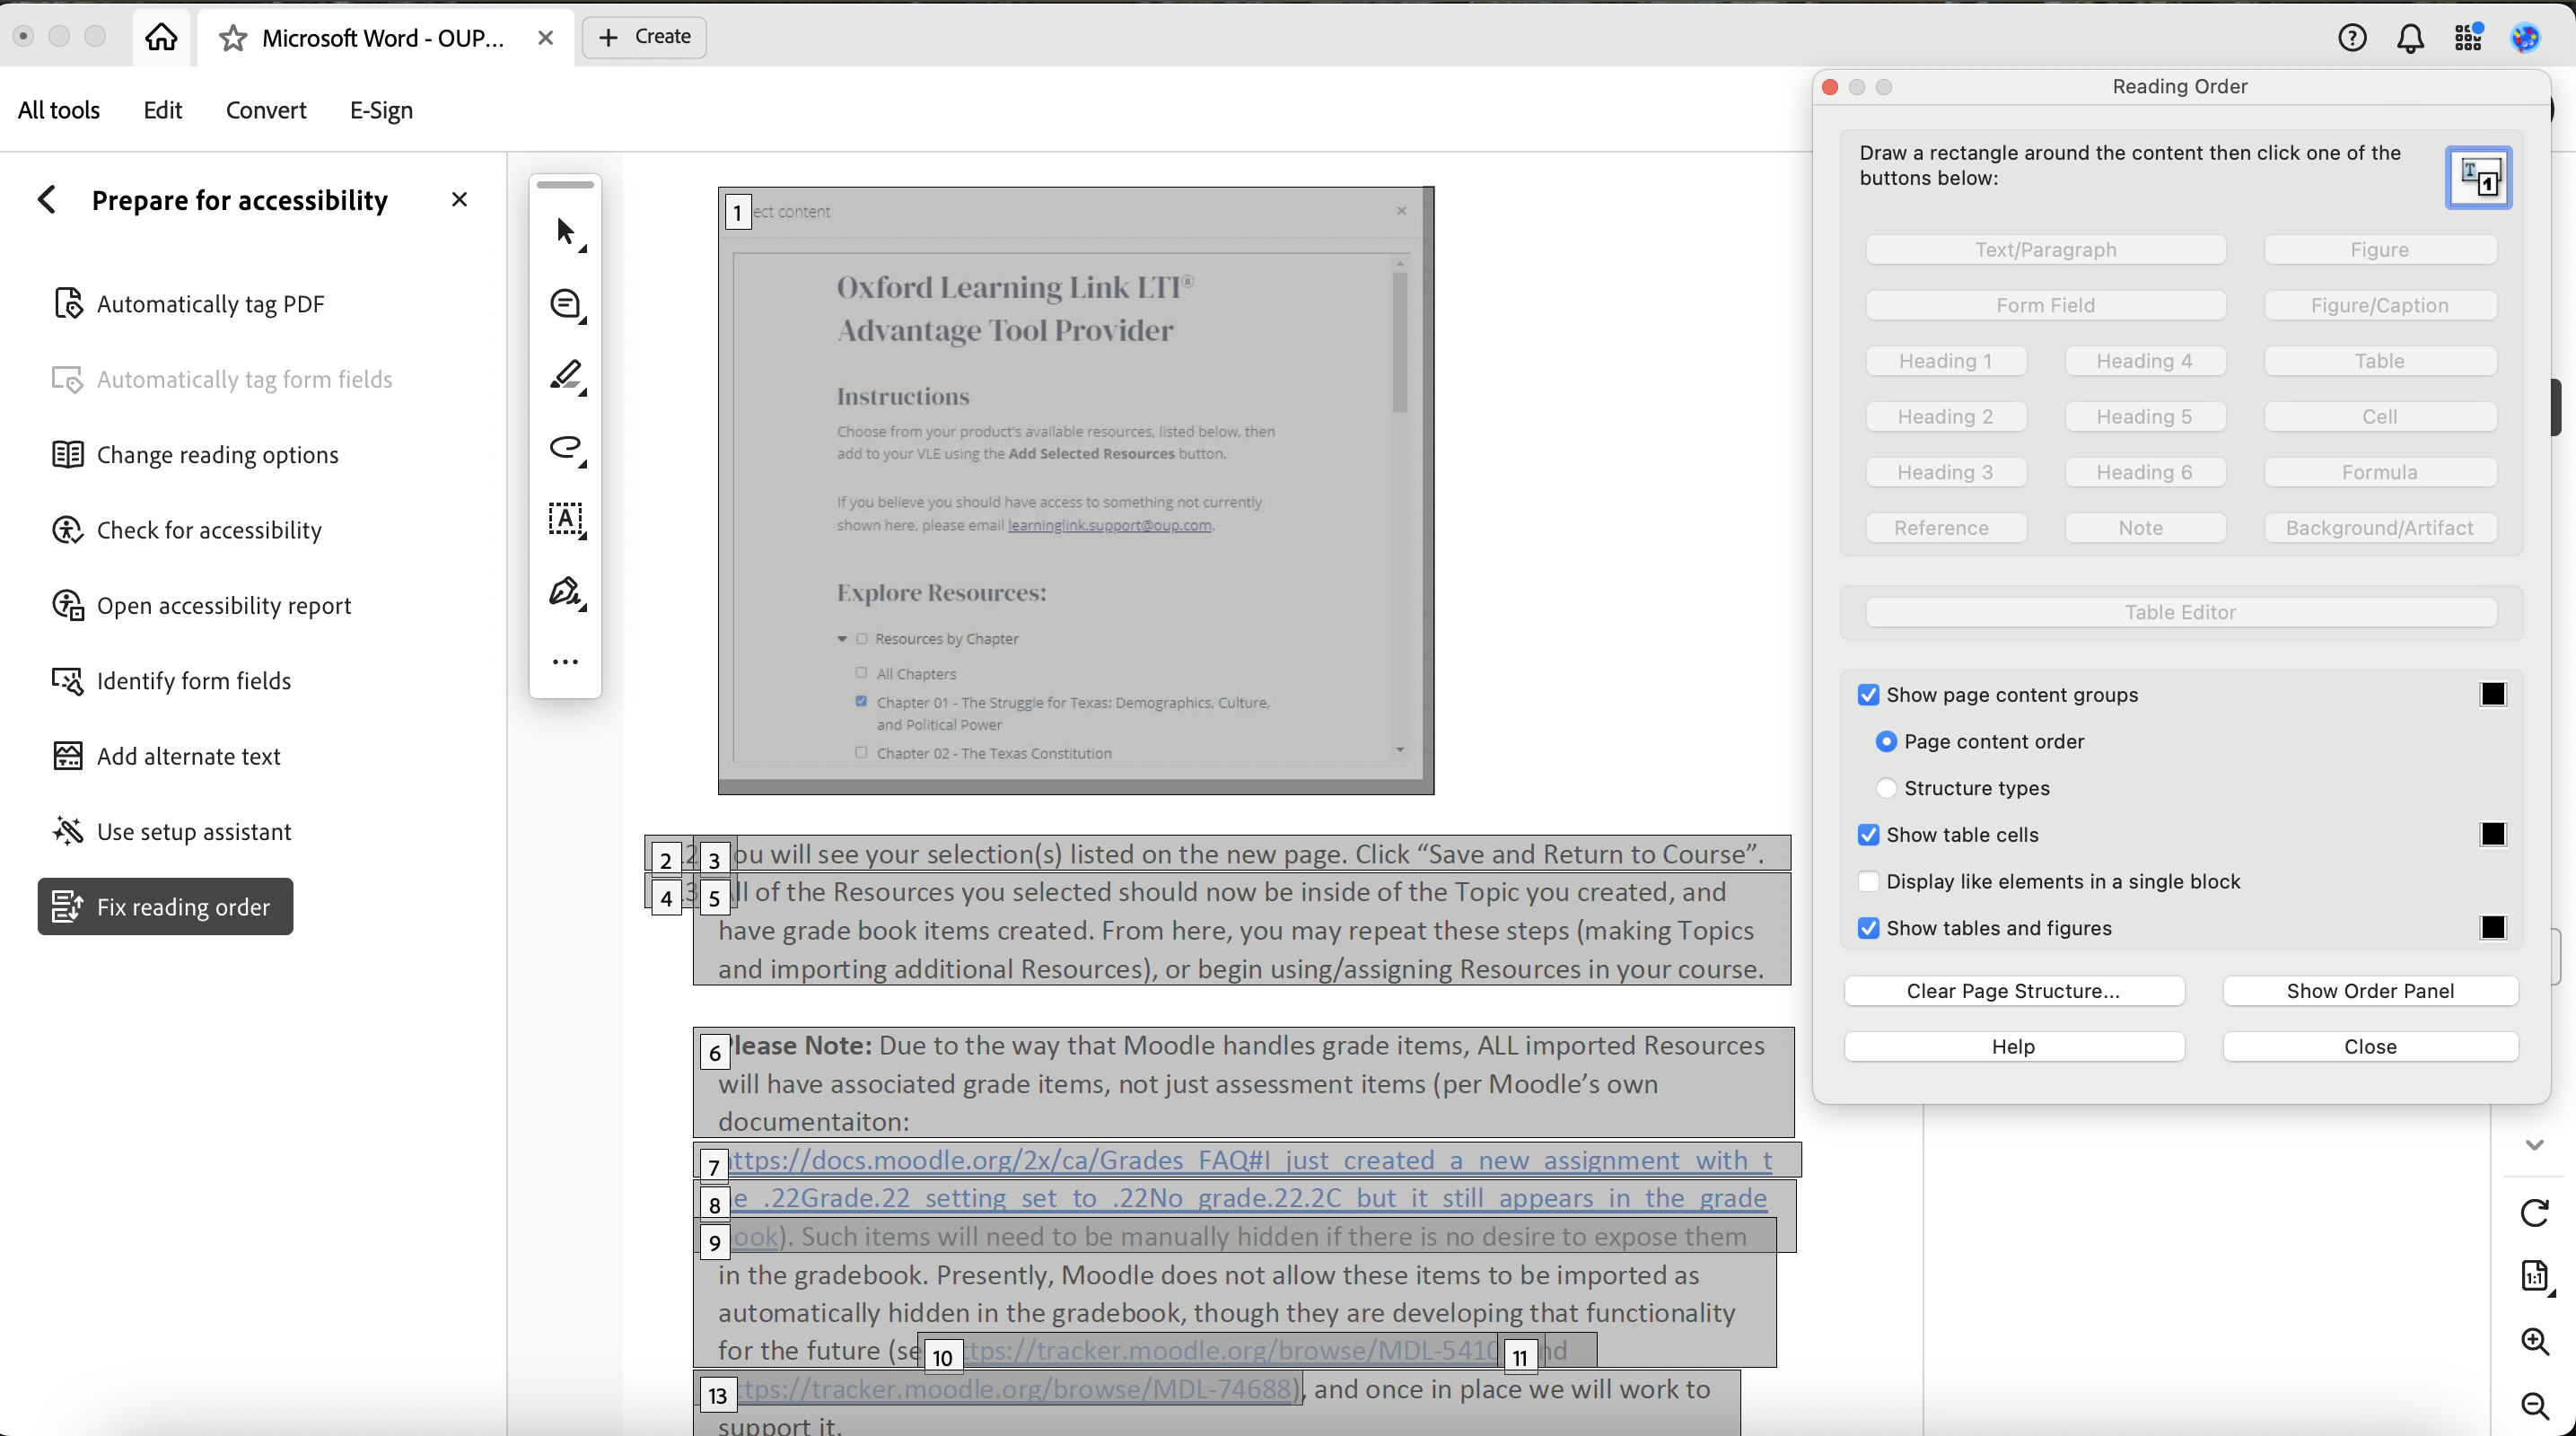
- Click on Logical Reading Order in the Accessibility Checker results pane to open the Reading Order pane.
- When the Reading Order tool is open, Acrobat puts boxes around each structural element on a page. (Move the tool and/or resize your page to see them all.)
- Make anything a screen reader should ignore an Artifact (such as smudges, decorative elements, headers, footers and page numbers):
- On the page, either:
- Click the label of a box to select it (your cursor will change to a hand when you hover over the label).
- Click the page and drag a box around the text within or across boxes to select it.
- On the Reading Order tool, click Artifact.
Note: Headers, footers and page numbers help sighted readers navigate, but in non-visual formats they lose referential value and become disruptive when read or presented in the middle of sentences and paragraphs. If headers or footers contain important information that isn't repeated elsewhere in the document, leave the first or last instance (whichever is least disruptive when read aloud) tagged as Text/Paragraph and mark all other instances as Artifacts.
- In the Reading Order tool, check Show page content groups (if not already checked), then select Page contentorder to number the boxes on the page in the order in which a screen reader will read them aloud.
- Check the order of the boxes on each page, and fix anything out of order:
- Click Show Order Panel on the Reading Order tool to open a panel listing page elements in numerical order.
- Click an item in this Order Panel, drag it to the correct spot in the list, and release it when an insertion line appears.
- The page element box numbers will change to reflect the new reading order.
Complex Documents
Complex documents with multiple columns, sidebars or footnotes are more likely to have issues. These are the most common and how to fix them.
Scans with two facing pages
Make sure each of the pages is a separate box. If not, a text-to-speech reader will read left-to-right across both pages; to fix this:
- On the document page, click and drag to draw a box around the left-most page block.
- On the Reading Order tool, click Text/Paragraph to make the selected text a separate group.
- Repeat for the right-most page block.
- Double-check the reading order of the groups and fix if needed.
Multi-column documents
Make sure each column is a separate box. If not, a text-to-speech reader will read left-to-right across both multiple columns; to fix this:
- On the document page, click and drag to draw a box around the left-most column.
- On the Reading Order tool, click Text/Paragraph to make it a separate group.
- Repeat for each column, moving from left to right.
- Double-check the reading order and fix if needed.
Documents containing “non-body” text (captions, footnotes, etc.)
The position of these elements on the page is not always a good place for text-to-speech reader to announce them. For example, an captioned image would be less disruptive if read at the end of of a paragraph, rather than in the middle. For the best reader experience, place each non-body text element in separate boxes to control the reading order:
- On the document page, click and drag to draw a box around a non-body text element (footnote, caption).
- On the Reading Order tool, click Text/Paragraph to make it a separate group.
- Repeat for each block of text you want group separately.
- Adjust the reading order so that each element is read at the least disruptive point.
For more information
Questions?
If you have any additional questions or problems, don't hesitate to reach out to the Help Desk!
Phone: 610-526-7440 | Library and Help Desk hours
Email: help@brynmawr.edu | Service catalog
Location: Canaday Library 1st floor


