Panopto allows you to record and share in-person lectures or presentations. Panopto can capture your audio and video plus anything you project to the audience. Your recordings are automatically uploaded to Bryn Mawr's Panopto’s site if done while logged into your college Panopto account or Zoom account (see Zoom: Am I using A Bryn Mawr Zoom account? for more details). These recordings can then be shared students via a a direct link or through our Moodle integration.
Warning: We STRONGLY recommend you create test recordings in your classroom or on the computer you will using BEFORE your class's first meeting to uncover any technical issues. Contact Multimedia if you’d like an orientation to a particular classroom computer.
Record on a classroom computer
Bryn Mawr students, faculty and staff can record presentations in College classrooms equipped with a lecture capture camera through the classroom's (podium) computer and the Panopto desktop app. If you want to project from a laptop or iPad instead of the classroom computer, consult Zoom: Mirror an ipad in a classroom.
Before you start, you need:
Start a recording
- Log in to the classroom computer.
- Open applications and files needed for the lecture (such as PowerPoint slides, web browser and pages, PDF documents, etc.). Recording uses considerable computing resources; opening everything else before you start ensures sufficient resources are set aside for them ahead of time.
- If you are projecting overhead, use the room's control panel to select the classroom computer as the video source for the projector.
- Open Panopto on the taskbar, Dock or desktop to open the Panopto for Windows or Panopto for Mac. Then, log into it. See Panopto: Get and log into your account if you need help with this step.
- On the Create New Recording tab, choose the Folder in your Panopto video library where you want to store the recording (this can be changed later if needed):
- Choose the course short name (e.g., bmc.BIOL.B101.001.SP20) for an academic course.
- Choose My Folder to record to your personal Panopto folder

- Give the Session a meaningful name or use the default (you can also change it after recording or later on in Panopto).
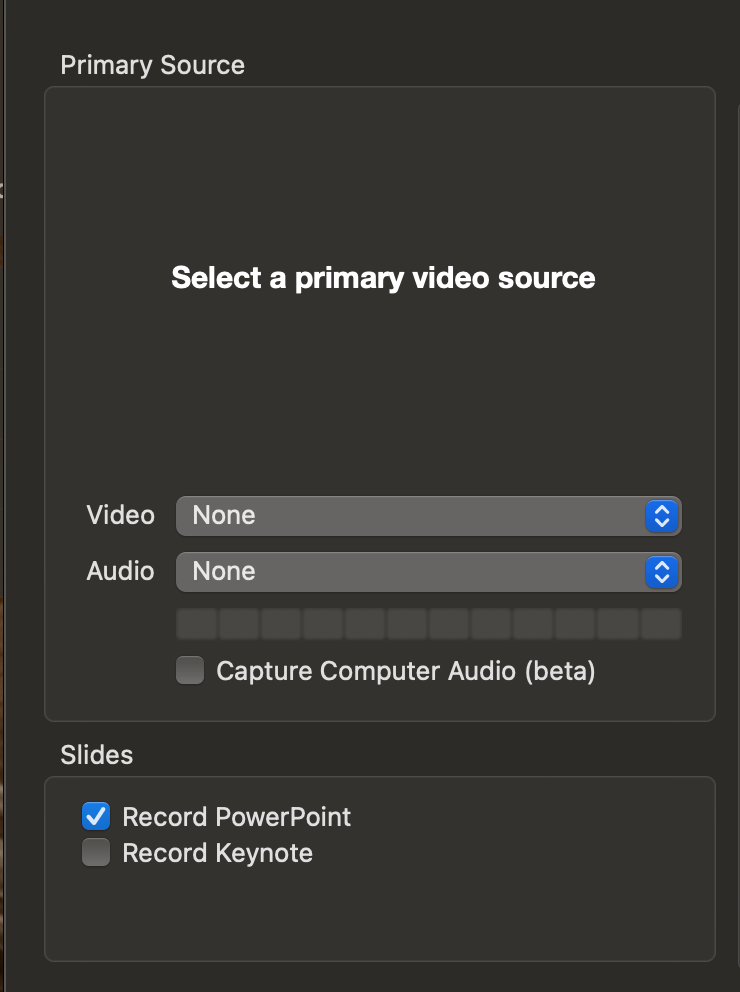
- In the Primary Sources box, check your Audio levels by speaking and watching the microphone bar.
- If the volume is hitting the max but the sound is too low, check for a podium microphone that needs to be turned on. Some of these microphones are directional (designed to pick up sound from a certain direction). You may need to move a bit to find and the sweet spot.
- If audio isn't registering at all, choose a different option from the Audio drop-down menu. In some rooms, the video camera provides the only microphone and you must record video in order to record audio.
- Contact the Help Desk (610-526-7440) for help troubleshooting audio.
- If you wish to record video of your speaker, select a camera from the Video drop-down; otherwise choose None.
- Check the video preview window to ensure the camera is positioned correctly.
- Some rooms have two cameras. Be sure to select the one facing the podium (lecture capture camera), not the one facing the audience (video-conferencing camera).
- Some rooms have room cameras that can be panned and zoomed using controls on the room control panel. There is often a preset that re-centers the camera on the podium.
- Contact the Help Desk (610-526-7440) for help troubleshooting video.
- Check Capture Computer Audio box if you will play media with sound on the podium computer during the talk and you wish to include that sound in the recording.
- Select and configure any Secondary Sources you want to capture:
- You can change the selection in Secondary 1 and Secondary 2 if you want to capture other cameras in the room, what is on your computer screen or a secondary monitor. If you are planning on setting up a powerpoint slide, make sure you have Record PowerPoint (on Macs) or Capture PowerPoint (on PC's) checked and make sure your presentation is full screen so nothing else on your desktop screen is captured.
- Please do not try to connect new video sources to a classroom computer yourself, as you could disturb other connections and settings. Contact Multimedia (multimedia@brynmawr.edu or 610-526-7449) for help if needed.
- Click Record to begin recording. If you are capturing or projecting the screen, you can minimize the recorder window so that it is out of the way.
Stop and upload the recording
You can click Pause in the recorder window at any time to temporarily stop recording — for example, while speakers are switching places.When you are ready to end the recording, do the following:
- Maximize the recorder window if needed and click Stop.
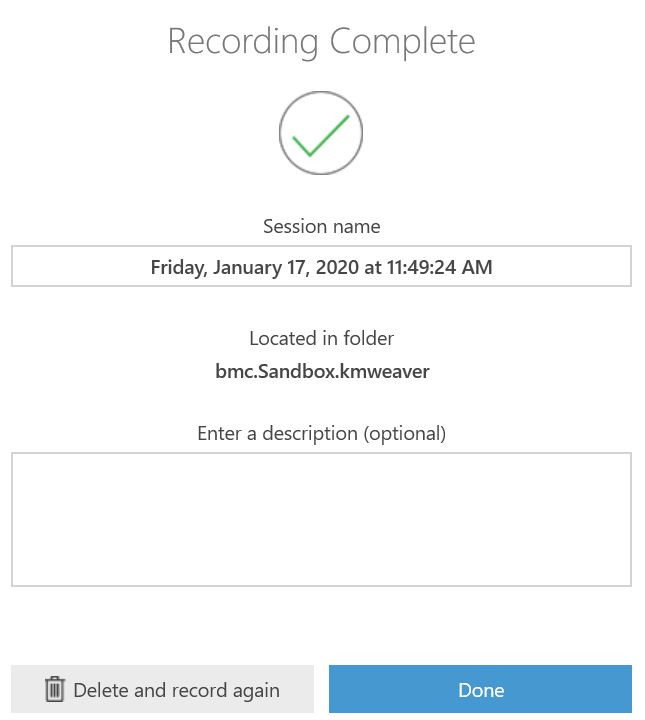
- Click Done in the Recording Complete dialog window.
- Sign out of/lock the podium computer or put it to sleep.
Panopto will upload the recording to the folder you specified before starting the recording. Some things to keep in mind about this process:
- These uploads typically take about 15-30 minutes for a one-hour video, but can be longer at peak traffic times.
- You do not have to be logged into the computer during the upload. It runs in background as long as the computer remains on and connected to the Internet, even if other users log in and start new Panopto recordings.
- We have disabled shut down on podium computers to ensure recordings fully upload. However, if an upload is disrupted due to a power or Internet outage, it should automatically resume once the computer is back online. If not, it can be recovered from the local copy. See Panopto: Where are my recordings? for more details.
Record on another computer
Bryn Mawr students, faculty and staff can also record lectures from any computer that has a microphone and the Panopto desktop app. See Panopto: Record in your browser (Panopto Capture) if you want to record online rather than on an app. Otherwise, use the following instructions to record with the Panopto app.
Before you start, you need:
- An account on Bryn Mawr's Panopto license (Haverford or Swarthmore affiliates should record to their college's Panopto site instead).
- A computer with a microphone (a laptop's built-in microphone and headphones may be fine, but headset microphones helps in noisy environments)
- A webcam, if you want to record video.
You can borrow microphones and webcams from Canaday Library’s equipment loan pool.
Download the Panopto Recorder
If you don't the Panopto on the desktop or in the taskbar/dock, you can download the recorder software from Panopto. See How to Download and Install Panopto for Windows or
How to Download and Install Panopto for Mac, if needed.
Start the recording
- Open applications and files needed for the lecture (such as PowerPoint slides, web browser and pages, PDF documents, etc.). Recording uses considerable computing resources. Opening everything else before you start ensures sufficient resources are set aside for them first.
- Double-click Panopto on the taskbar, Dock or desktop to open the Panopto app and log in.
- On the Create New Recording tab, choose the Folder in your Panopto video library where you want to store the recording (can be moved later if needed):
- Choose the course short name (e.g., bmc.BIOL.B101.001.SP20) for an academic course.
- Choose My Folder to record to your personal Panopto folder.

- Give the Session a meaningful name or use the default. You can also change it later if needed.
- In the Primary Sources menu, check your Audio levels by speaking and monitoring the microphone bar.
- If audio isn't registering at all, choose a different Audio source from the drop-down menu. This menu should list all audio sources on your computer. If something is missing or not working, use your computer's troubleshooting options to fix it.
- If you wish to record video, select the camera source from the Video drop-down. Otherwise, choose None.
- Select and configure any Secondary Sources you want to capture:
- You can set a Secondary 1 and Secondary 2 if you want to capture other cameras connected to your computer. If you are planning on setting up a powerpoint slide, make sure you have Record PowerPoint (on Macs) or Capture PowerPoint (on PC's) checked and make sure your presentation is full screen so nothing else on your desktop screen is captured.
- Click Record to begin recording.
Stop and upload a recording
You can click Pause in the recorder window at any time to temporarily stop recording — for example, while speakers are switching places. (Panopto keeps recording to ensure no data is lost, and then automatically deletes the paused portion during post-processing.)
When you are ready to end the recording:
- Maximize the recorder window if needed and click Stop.
- Click Done in the Recording Complete dialog window.
Panopto will immediately begin uploading to the folder you specified in your Panopto video library. These uploads happen in the background, so you can do other things on your computer while they're happening. They typically take about 15-30 minutes for a one-hour video, although it can be longer at peak traffic times.
Do not turn off your computer until the upload is complete; however, you can sign out, lock the computer and/or put it to sleep.If you do shut off the computer or lose power or Internet access before a recording finishes uploading, it will automatically resume the next time your computer is back online. If not, it can be recovered from the local copy. See Panopto: Where are my recordings? for more details.
Questions?
If you have any additional questions or problems, don't hesitate to reach out to the Help Desk!
Phone: 610-526-7440 | Library and Help Desk hours
Email: help@brynmawr.edu | Service catalog
Location: Canaday Library 1st floor


