Image Size and Format Guide
Our image library allows users to upload an image that can be used most anywhere on the website, whether it is in a Hero Slider, WYSIWYG, directory portrait, News article, Story or Flex-content Item. Because of an image item’s versatility, most images should be uploaded with a Target Minimum Dimension to use, depending on the initial intent of the image’s use.
With this in mind, it is a good idea to upload images that can work in the various displays across our site.
For image width dimensions (in pixels) for certain specific uses on our website, we've made this handy chart.
For any place you wish to add an item that isn't in the chart, the Suggested Default Target Minimum Dimension and DPI Range is as follows: 1900 pixels wide x 1064 pixels high at a 96-100DPI
| Image Display | Target Minimum Dimension | Image DPI Range |
|---|---|---|
| Flex-Item and Detail Nodes | in pixels (width x height) | DPI: dots per inch |
| WYSIWYG | 1600x1200 - min dimension | 96-100dpi |
| Callout | 1200x800 - min dimension | 96-100dpi |
| Carousel slide | 1200x800 - min dimension | 96-100dpi |
| Column | 1200x800 - min dimension | 96-100dpi |
| Contact | 1200x800 - min dimension | 96-100dpi |
| Event 3up | 1200x801 - min dimension | 96-100dpi |
| Feature Large | 1900x1064 - min dimension | 96-100dpi |
| Feature Medium | 1200x800 - min dimension | 96-100dpi |
| Feature Quote | 1200x800 - min dimension | 96-100dpi |
| Image Detail Large | 1900x1064 - min dimension | 96-100dpi |
| Image Gallery slide | 1900x1064 - min dimension | 96-100dpi |
| Image List | 1200x800 - min dimension | 96-100dpi |
| News 3up | 1200x800 - min dimension | 96-100dpi |
| People List | 300x300 - min dimension | 96-100dpi |
| Story 3up | 1200x802 - min dimension | 96-100dpi |
| Vertical Tab | 1300x1160 - min dimension | 96-100dpi |
| Homepage Feature Medium | 1600x1120 - min dimension | 96-100dpi |
| Homepage Feature Story | 850x1280 - min dimension | 96-100dpi |
| Homepage Hero Carousel Slide | 1900x1064 - min dimension | 96-100dpi |
| News Detail Node | 1900x1065 - min dimension | 96-100dpi |
| Story Detail Node | 1900x1066 - min dimension | 96-100dpi |
| Program Node | 1900x1067 - min dimension | 96-100dpi |
| Offices / Services Node | 1900x1068 - min dimension | 96-100dpi |
Importance of image size dimensions:
When any image is uploaded, Drupal applies the Focal Point you assign to that image and then crops and scales the image for the area in which it will be used. (Please refer to the Images in Drupal guide article for this in depth).
This means that some images could be used in places that are more horizontal, some more square or vertical, etc.
If we decide to use an image that has a small original size in a Feature Large Flexible Content Item, it may display as very pixelated as Drupal is trying to make a small image fit in a big display element.
See the Images in Drupal guide for further information on how to upload and embed images.
Creating Images for the web
Please also refer to our articles for preparing images: Prepare Images in Photoshop and Prepare Images in Word
If you do need to resize photos in Photoshop, please make sure to change the dimensions first and then change the dpi.
Speed is important!
Website visitors don’t care what format your images are in, they only care that they are viewable and downloaded in a timely fashion (even on slower connections). To accomplish this, images should be optimized for both speed and usability.
Image Mode: Use RGB format.
Image file format
JPG: Use this in most cases! This file type is good for saving images with millions of colors, including photographs and graphics with a variety of shades and gradients.
GIF: Best for line art/cartoon-like drawings.
PNG: Also an acceptable format, but not needed in most cases.
Please do not use other image file formats on the website.
Rules for Saving Images:
- Save a copy of the original! Make sure you have saved a copy of the original image, so that you can come back and edit it again later if needed. This may be a different format such as, .raw, .tiff, .png, or .psd, or it may simply be the original size of a .jpg (e.g. from your digital camera) It is especially important to save the original if layers have been added to the image or graphic file.
- Use JPEG files. Files ending in .jpg are often larger and take longer to load. However, most image editing tools allow you to select the file compression for .jpg. For example, you can choose Maximum, Very High, High, Medium, and Low. Try saving larger images under several compression settings and then test them for quality rendering and load times. Balancing quality, compression, and load times can be a judgment call depending on the particular image and the web document it appears in.
- Use web/screen resolution. Final web images should be saved at the same dimensions at the minimum 72 dpi (dots [or pixels] per inch) resolution though you can save the image with up to 150 dpi for the web.
- ALT-tags are required! An ALT tag is required for each image. "Alt" text is "alternative" text, e.g. it provides an alternative version of the information available in an image. This text is then included as a part of the code for the image, and can be read by screen reading software.
File sizes:
A file that is too large will take too long to load on the page, and can even be rejected when you try to upload it in Drupal. Choose the optimal file size based on how you are using the image:
- For banners or hero images, a file size up to 60KB is acceptable.
- For high end photographs, try to keep them to within 100KB at an absolute maximum.
Previewing an Image in Drupal
Remember, you can see the Preview of all the image sizes and orientations for any image you add to a content item.
Here is an excerpt on the Preview function from our Images in Drupal article
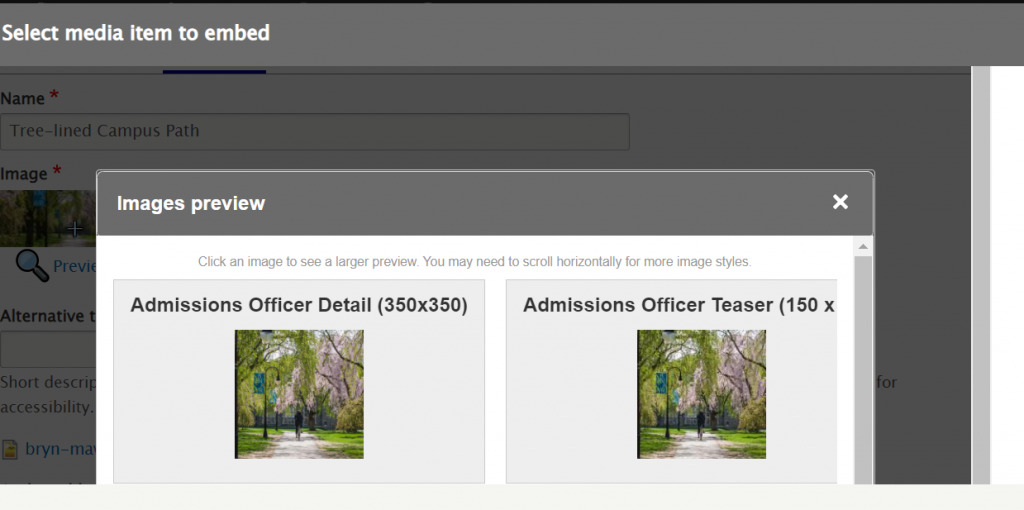
We can click on the Preview link under the thumbnail to see that this focal point we picked really will be the best part of the photo to never get cropped out.

This puts a pop-up window within our pop-up window that displays all the site-wide Image Styles of the image while employing the Focal Point we just selected. We clicked the Focal Point to be on the bike rider in the middle of the path.
These Image Styles are in a horizontal-scroll pane. If you scroll down you can see the original image for comparison. Here is a view of the horizontal-scroll-pane moved to see the difference between the News/Event Detail Portrait and the News/Event Detail Wide image styles.
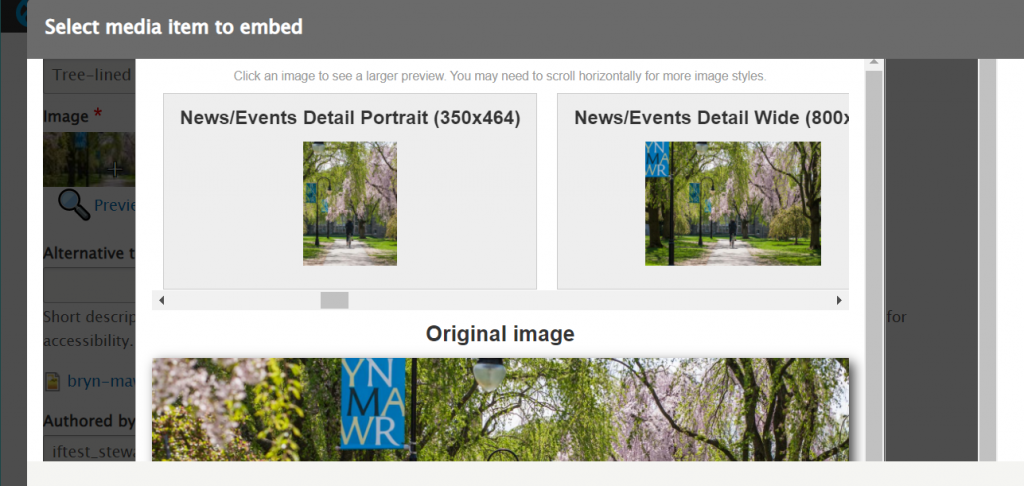
When you are finished with the Preview, you can click the X in the upper right of the Image Preview (inner pop-up window) to close the preview.
If after reading this article or watching the training videos you still have questions, we can help! Sign-up for any of our Drupal Drop-ins throughout the year. Schedule a Drupal training session for you or your whole department with our Drupal Trainer. If you have any additional questions or problems, don't hesitate to reach out to the Help Desk! Phone: 610-526-7440 | Library and Help Desk hoursStill need Drupal help? Have more Drupal questions?
Questions?
Email: help@brynmawr.edu | Service catalog
Location: Canaday Library 1st floor
