Login:
Log in and choose the Group in which you want to create or edit a page. Groups in the new website are akin to Sections from the old website. Read more about logging in and finding content.
The Group Management Screen:
When you first log in, you can click on the "Groups" tab in the Admin Toolbar you will go to a screen to see links to your sections.

That will take you to a page that looks like this

Click the link for the Group you wish to work on to get to your Group management screen.
If you clicked on Biology you would then see this screen

Add Content:
From your Group management screen, under “Add Content to [section],” click “Basic Page.”

Basic Page:
This Content Type has Flexible Content to add to the page, but it also has basic parts for you to put minimal content in without getting too fancy.
When you select “Basic Page” from your Group page, you will get a screen where you can enter content into a new Basic Page

As you can see, the only required field is the Title.
Hero Image
You can add a Hero Image by pressing the Upload or Browse Library button and selecting the image to embed. Read more about uploading media here.
If you pressed Save now, you would see the title overlaying on the Hero Image on your page, like so

Introduction
The next field available is the Introduction field.

This field is a simple WYSIWYG field that allows only bold, italic and linked text.
This is what it looks like once we have saved the page. Here you can see the bottom of the Hero Image just before the Intro.

Quick Links
The next field available is Audience Quick Links.
This is really a specially styled version of the Special List Small that you would also find in the Flexible Content area.
The Audience Quick Links can’t be moved on the page. Unlike the Special List: Small, which can move within the Flexible Content area.

Once the “Add Special List Small” button under Audience Quick Links is pressed, an area to enter a Special List small appears

Fill it out with Quick Links you would like to appear at the top of the page. You can use the anchor link method to link to content within the WYSIWYG further down the page, or you can link to some content on our site or to an external link.
The Audience Quick Links will not have a background option applied, it will always be default white.

When you press Save you can see that this list appears next to the Intro that we added

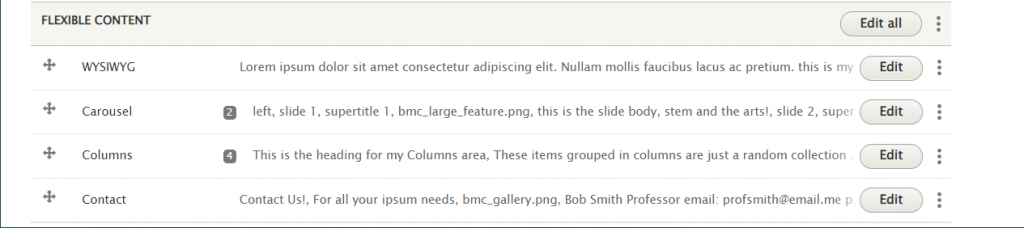
Flexible Content Items
The rest of the Basic Page gives you Flexible Content that you can add as you wish. The most important one will be the WYSIWYG so you can add the majority of your content. The rest of the Flexible Content Items are to highlight, feature or syndicate content.
Please see the following Articles for how to use the following Flexible Content Items.
- FLEX: Basic - WYSIWYG (basic, links, tables, blockquotes and images & videos from library)
- FLEX: Basic 2 - Accordion, Callout, Carousel, Contact, Embed, Social Media: Callout, Special List: Large, Special List: Small
- FLEX: Intermediate A - WYSIWYG (Video), Columns, Feature: Grid, Image Gallery, Image List
- FLEX: Intermediate B - People: List, Social Media: Connect, Feature: Large, Feature: Medium, Feature: Quote, Image Detail: Large
- FLEX: Advanced - Event 3-up, News 3-up, News & Contact, Story 1-up, Story 3-up, Announcement 4-up
See an example: a Basic Page with all the Flexible Content Items on our Web Services Example page.

Flexible Content Items on a Basic Page are
- WYSIWYG
- Accordion
- Announcement 4-up
- Callout
- Carousel
- Columns
- Contact
- Embed
- Event: 3-Up
- Feature: Large
- Feature: Medium
- Feature: Quote
- Image Detail: Large
- Image Gallery
- Image List
- News: 3-Up
- People: List
- Social Media: Callout
- Special List: Large
- Special List: Small
- Story: 1-Up
- Story: 3-Up
Positioning content:
Once you’ve added your Flexible Content, you can reorder it by drag-n-dropping the Flexible Content Items when you are editing the page.
Please note that Hero, Intro, and Audience Quick Links are all in a fixed position.
Only the Flexible Content Items can be reordered in relation to other Flexible Content Items.
Saving content
Save at the bottom left of the Page creation screen.
By default, pages will be saved as a Draft, which means it will be unpublished and only people logged into Drupal would be able to see it.
To learn more about what Draft, Published and Unpublished versions of a page are, please refer to our article Introduction to Drupal Drafts
The page will save with no menu link unless you have the Menu Editor role. If you do not have the Menu Editor role, read below for more info on getting your page into the site’s menu.
Menu Links
After you create/save a page you will need to reach out to Communications to have the page set in the menu.
Until this is done, the page will have no left-hand navigation for the department/Group.
The other way you could do this would be to reach out to Communications first and have Communications set up the page in the correct Group with the menu link and leave it in an unpublished state for you to edit.
If you are a Menu Editor, please read more about how to use menus.
If after reading this article or watching the training videos you still have questions, we can help! Sign-up for any of our Drupal Drop-ins throughout the year. Schedule a Drupal training session for you or your whole department with our Drupal Trainer. If you have any additional questions or problems, don't hesitate to reach out to the Help Desk! Phone: 610-526-7440 | Library and Help Desk hoursStill need Drupal help? Have more Drupal questions?
Questions?
Email: help@brynmawr.edu | Service catalog
Location: Canaday Library 1st floor
