Adding Video in Drupal
Adding a YouTube or Vimeo video can be done by embedding directly in the WYSIWYG Editor by following the instructions below.
Adding a Panopto video requires you to use an Embed Flexible Content item. Read more about the Embed item in our FLEX: Basic 2 article.
Embed a Video (YouTube or Vimeo)
This feature is limited to only YouTube or Vimeo videos.
If you wish to embed a Panopto video, please see our Embed Other Content Items instructions.
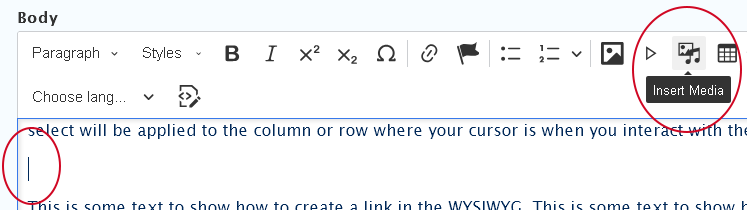
To embed a video in the WYSIWYG via the Insert Media button, you would place your cursor where you want the video to appear and then click the Insert Media icon in the toolbar.
- Place cursor on a new line where you want your video to appear
- Press the Insert Media button in the toolbar
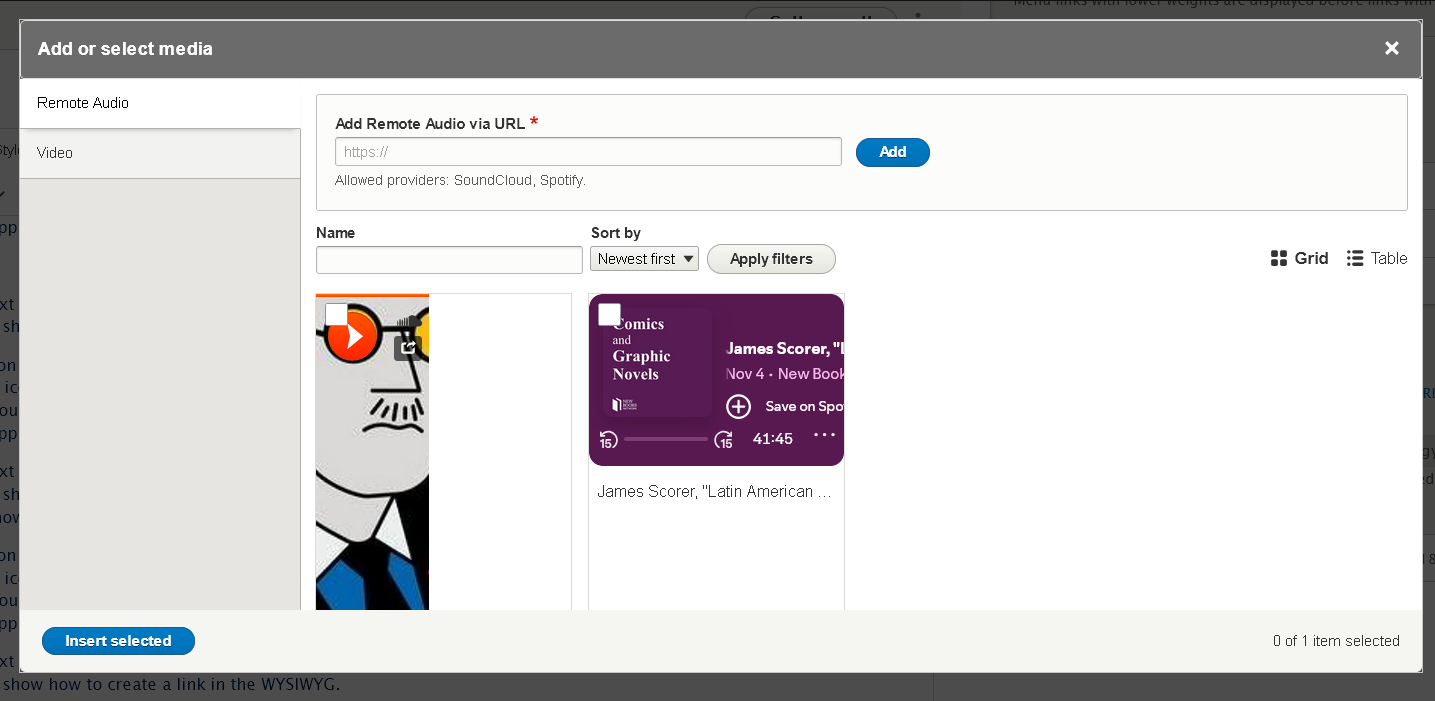
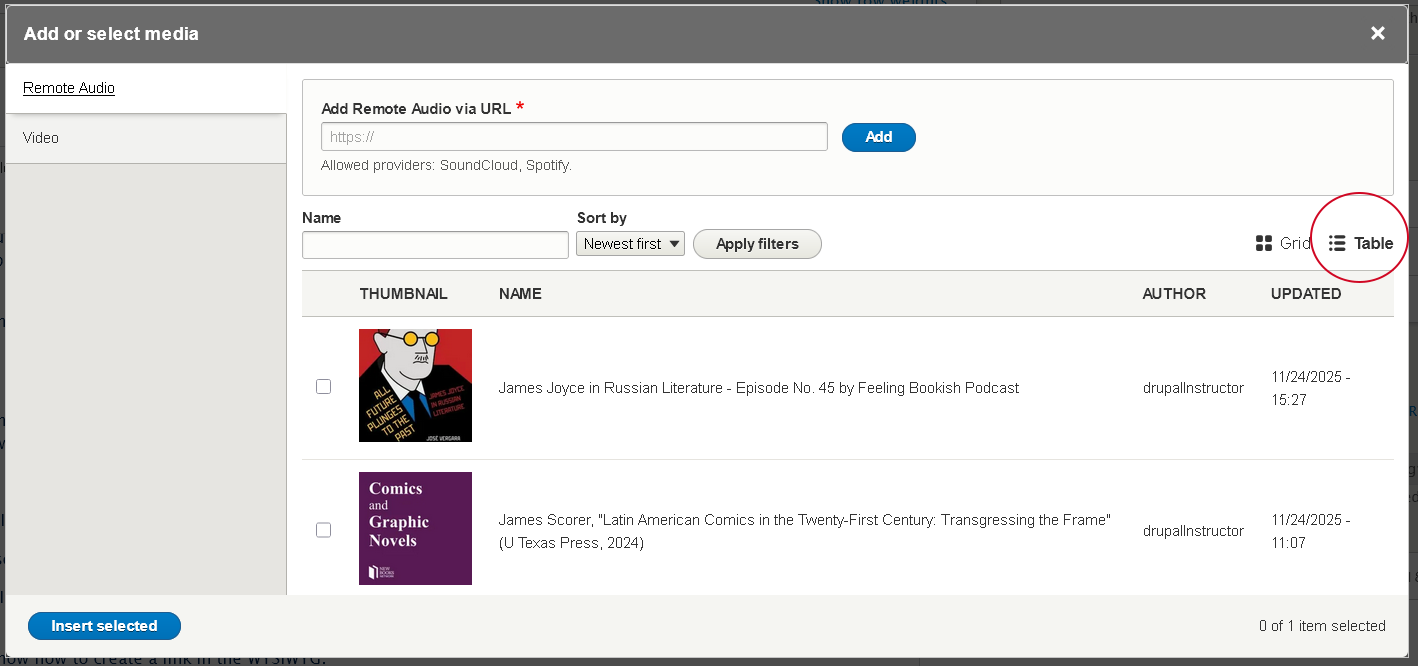
- The Media Library modal window will open. The default is that the Remote Audio tab is selected upon opening the modal window.
- First select the Vertical Tab on the left for the type of media you are inserting. In this case it will be the "Video" tab
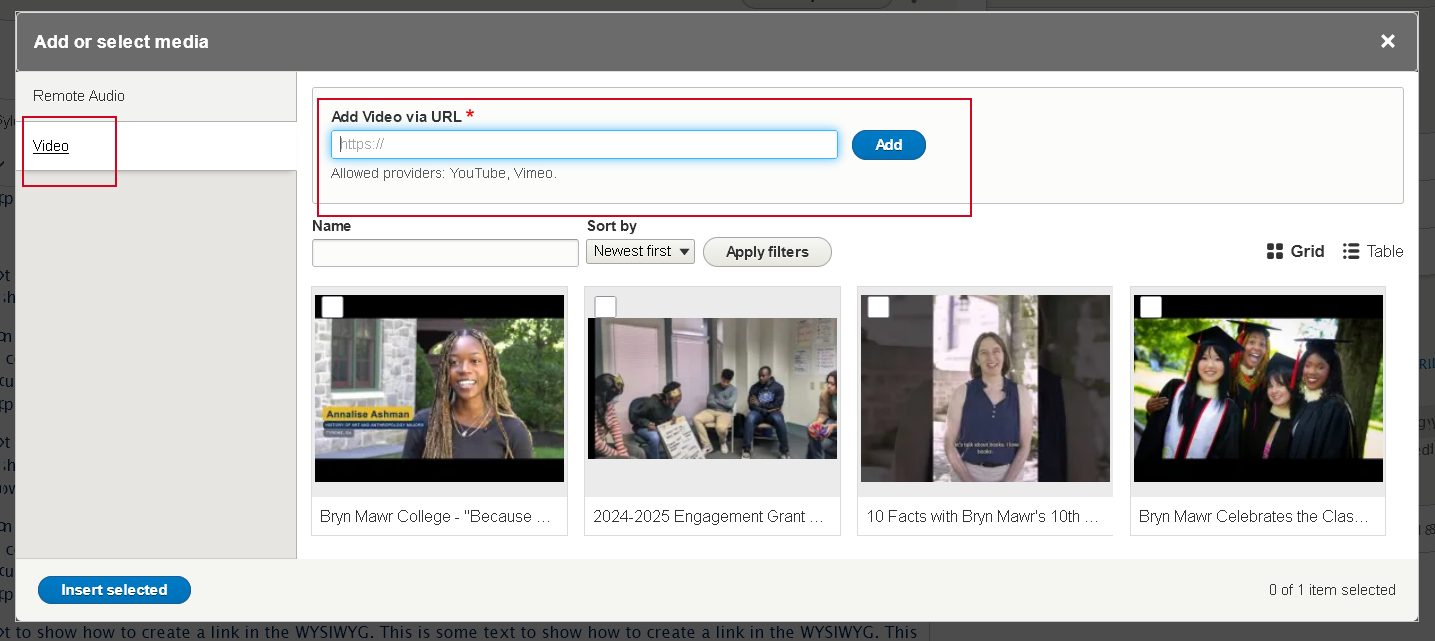
- You can now choose toUse an existing videoorAdd a new one to the library
- Find anExisting Video in the library
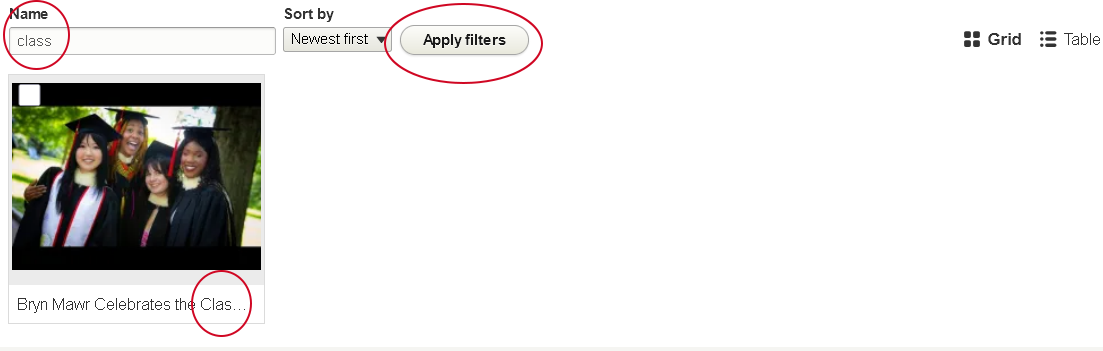
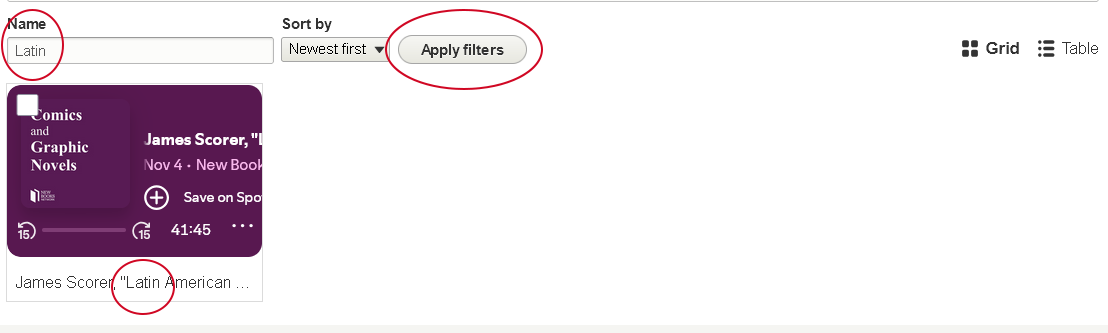
- Using the Name filter, type a word you think the Name contains and press "Apply filters". This example will yield all the videos whose name contains "class", for instance. To clear the Name filter, simply delete the phrase you entered and then press "Apply filters" again.
- You can also use the "Table" view by clicking the icon to the right of the filters, incase the Grid view isn't as helpful
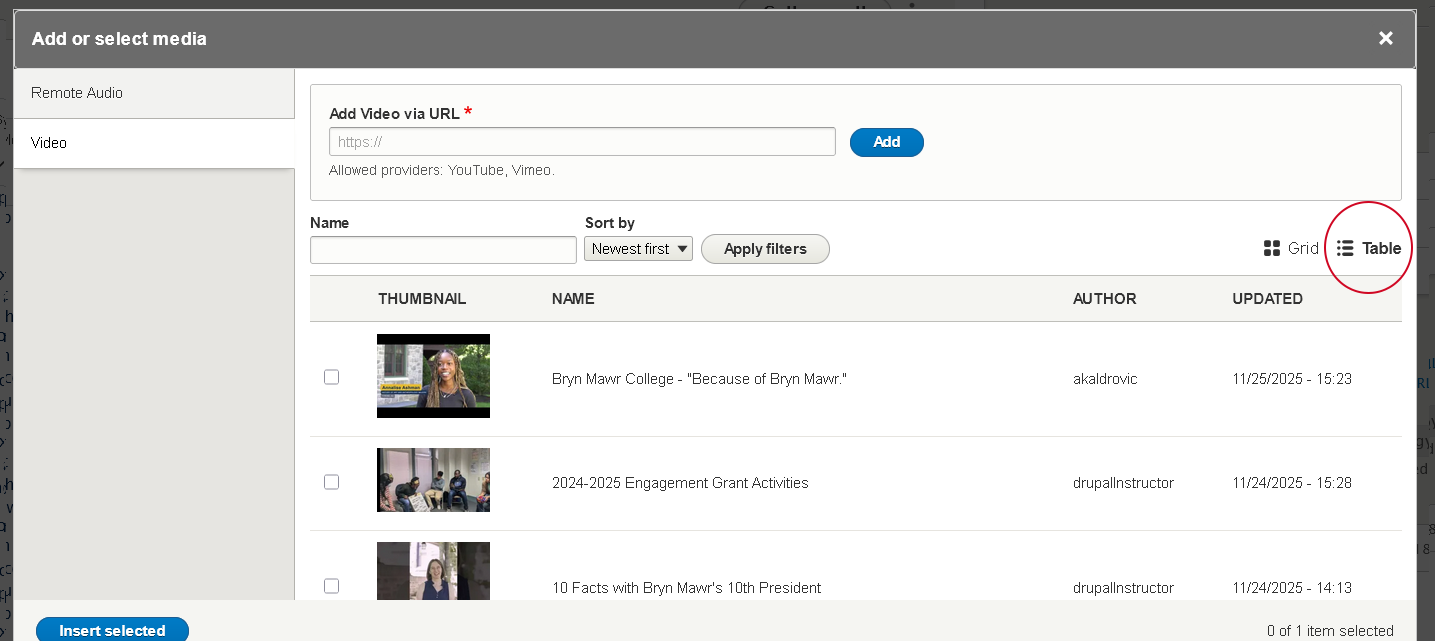
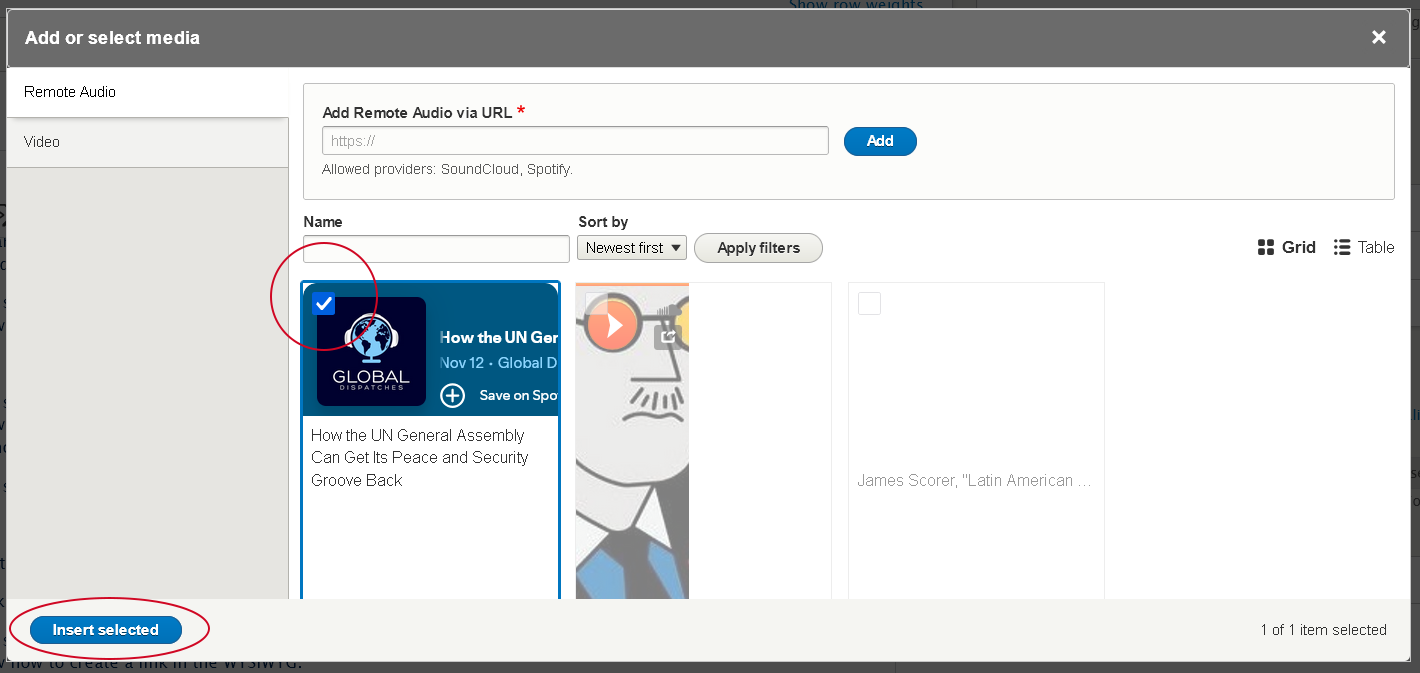
- depending on the view (Grid or Table), click on the video or check the box next to the video you wish to insert
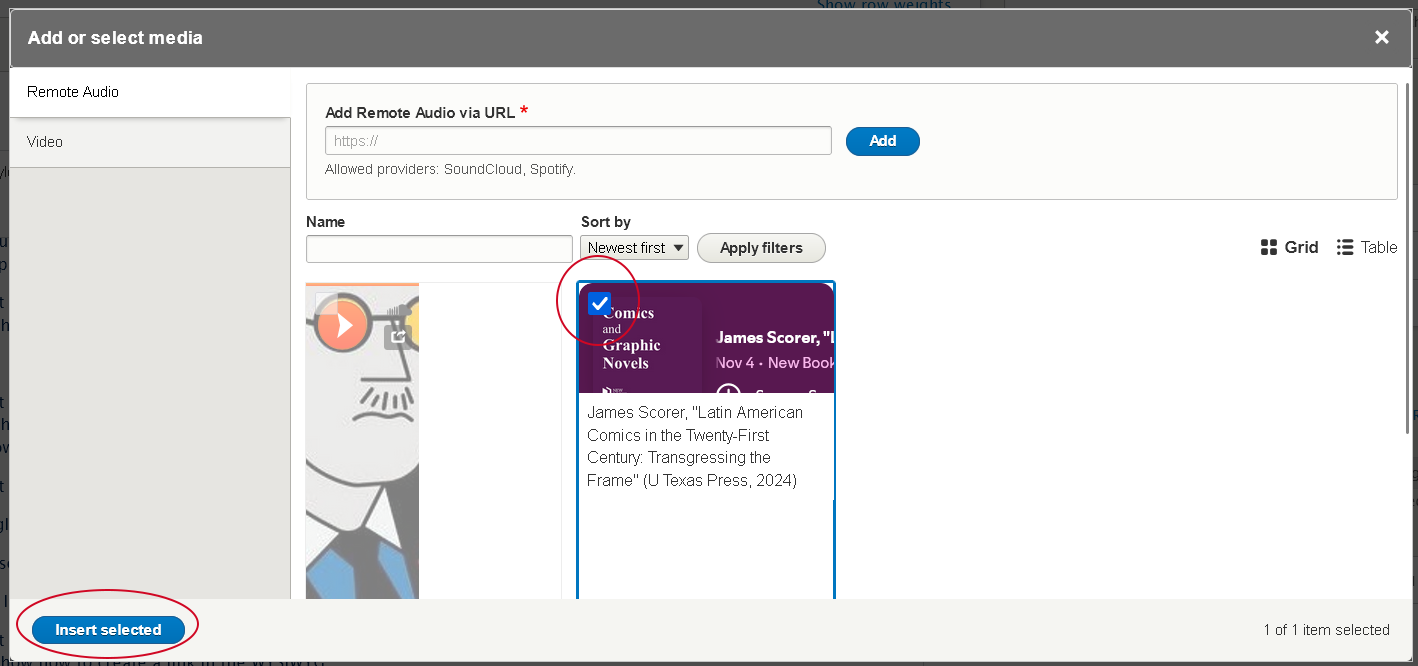
- press the "Insert selected" button at the bottom of the modal window
- Using the Name filter, type a word you think the Name contains and press "Apply filters". This example will yield all the videos whose name contains "class", for instance. To clear the Name filter, simply delete the phrase you entered and then press "Apply filters" again.
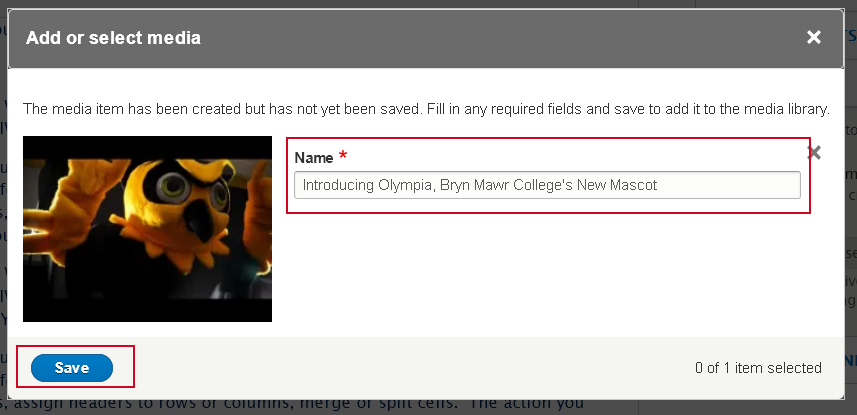
- Add a New Video to the library
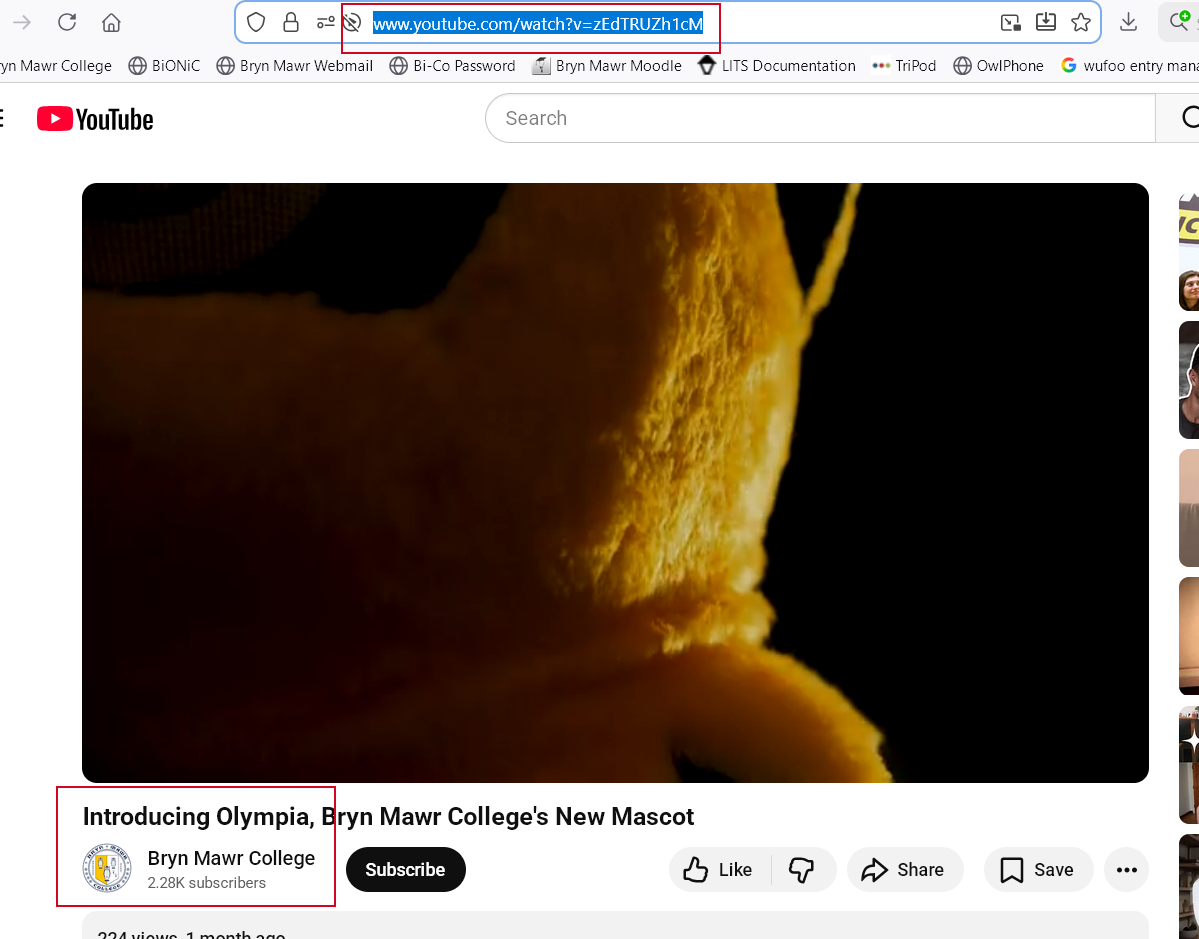
- visit your video on the web. for example, we are going to the Bryn Mawr College YouTube channel and selecting a video to view.
- once there, you can simply copy the URL from the browser address bar
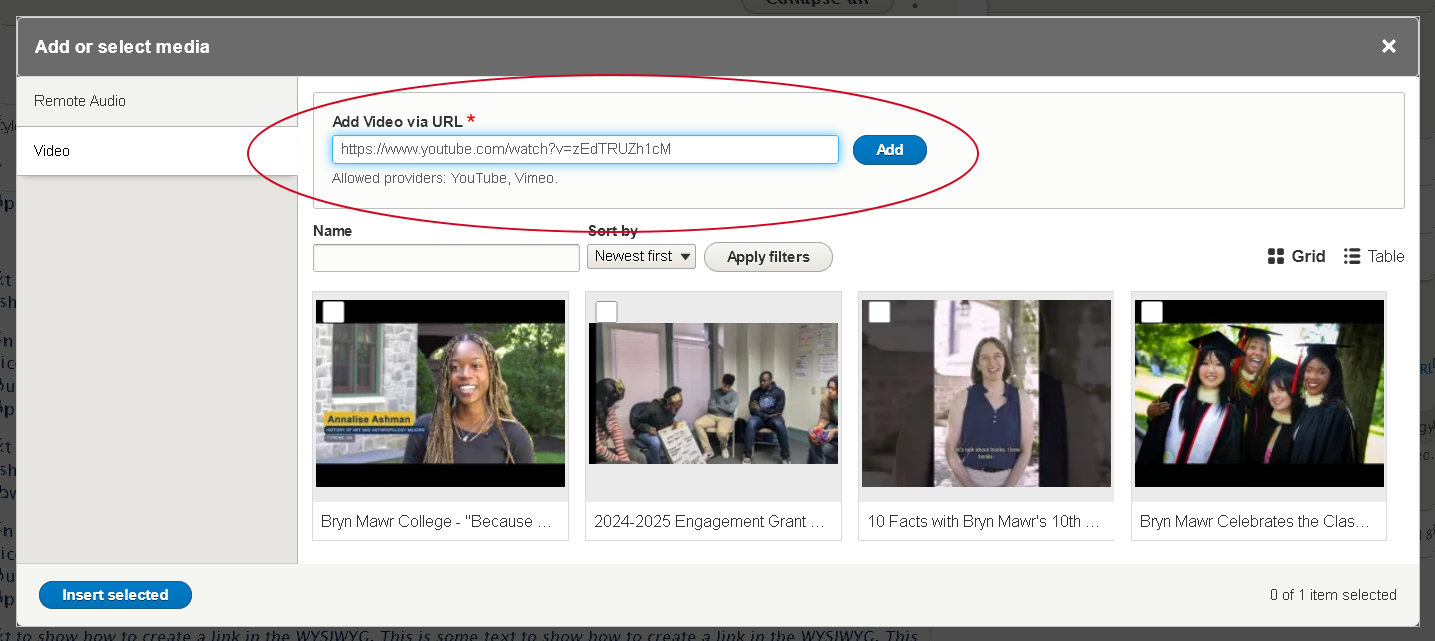
- then, simply paste that URL into the "Add Video via URL" field and click the blue "Add" button
- this will take you to a different modal window that lets you edit the Name field of the Video. This field is how you will find the video later in the library.
- once you are satisfied you can click the "Save" button
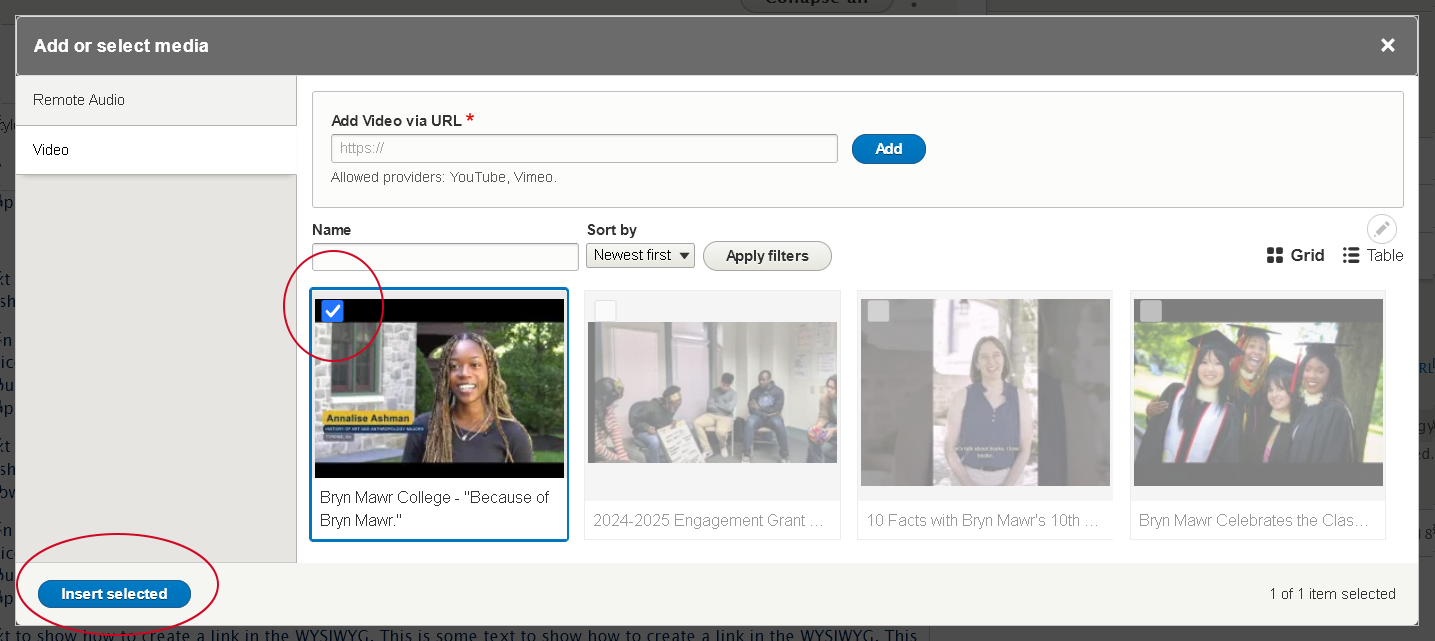
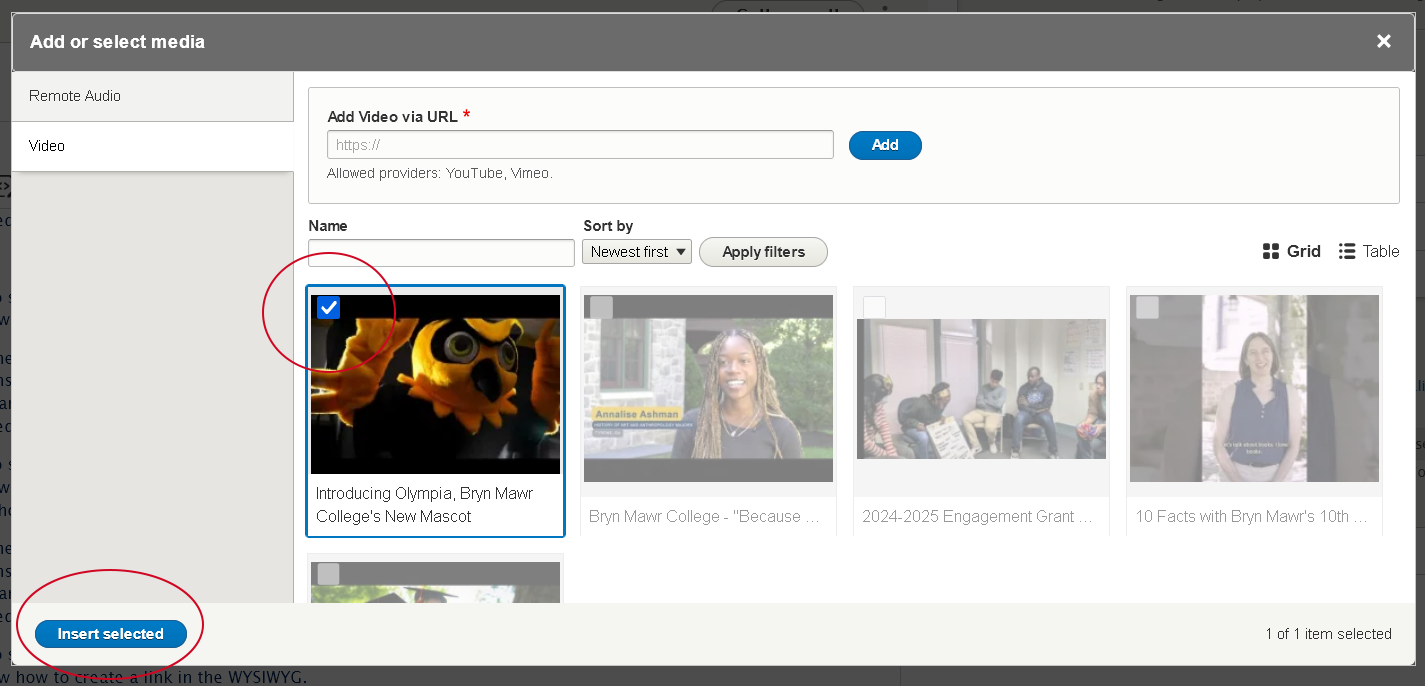
- this takes you back to the library modal, where you can see that the video has a check mark on it. This means it is already selected.
- If you are happy that is the video you wish to select, press the "Insert selected" button
- Find anExisting Video in the library
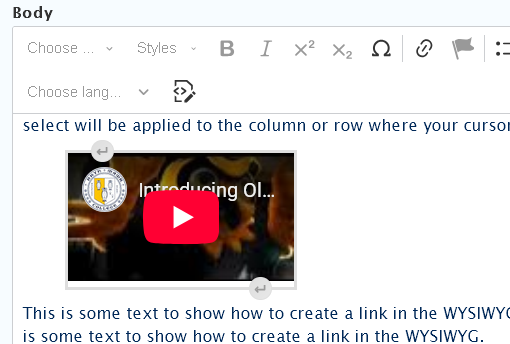
- Once you are back in the editor, you will see that the video seems small.
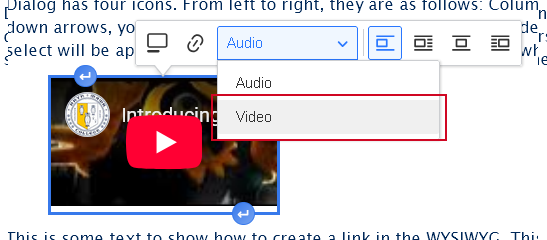
you can click once on the video to make the Video Dialog appear to adjust how it should appear.- select the "Video" view mode. This will ensure it displays properly on the page
- you can also choose to float the video to the right or the left, which will then have the text on the page wrap around it.
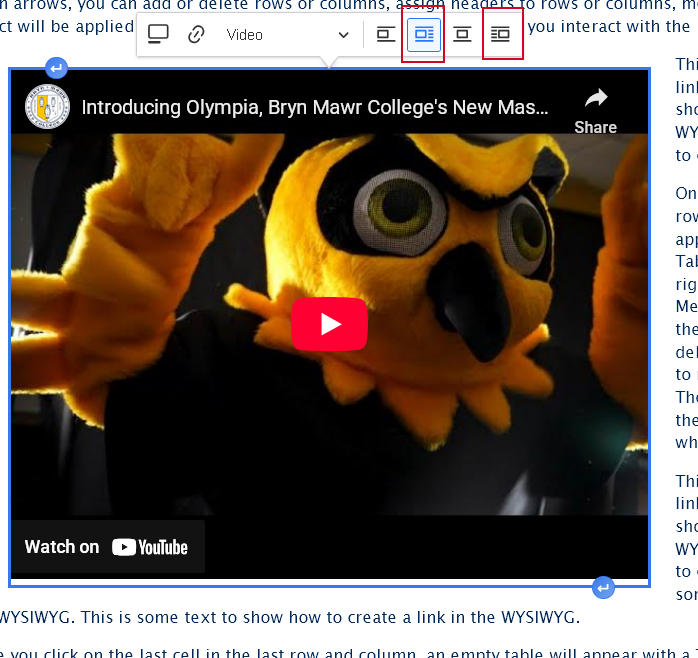
- you can also choose to add a caption to the video
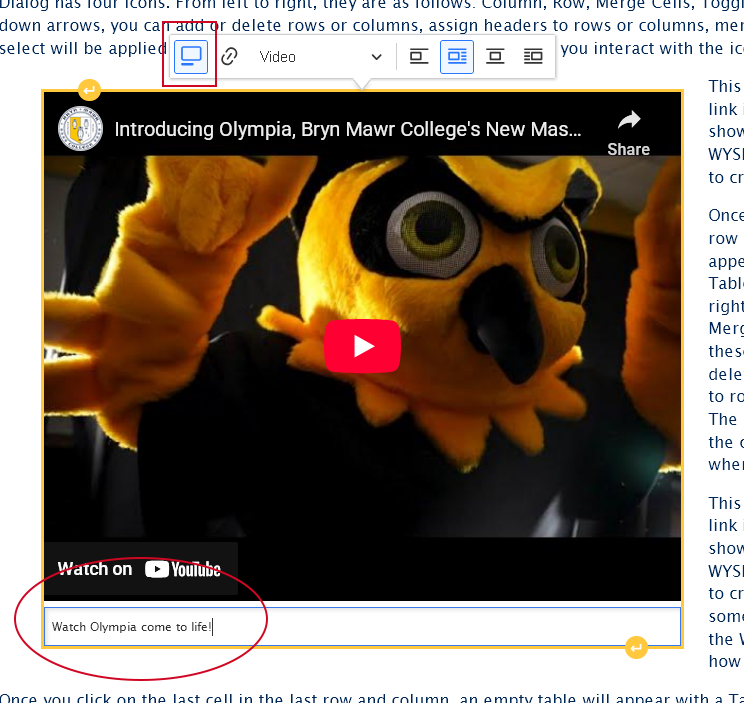
- select the "Video" view mode. This will ensure it displays properly on the page
- Similarly to an Image, you can use the "Insert Paragraph" before and after buttons that you see if you hover on the video in order to add content before or after the video


Adding Audio in Drupal
Adding a Spotify or SoundCloud audio can be done by embedding directly in the WYSIWYG Editor by following the instructions below.
Embed an Audio (Spotify or SoundCloud)
This feature is limited to only Spotify or SoundCloud audio tracks.
What if my audio track, podcast or playlist can't also be found in Spotify or SoundCloud? please see our Embed Other Content Items instructions.
To embed an audio in the WYSIWYG via the Insert Media button, you would place your cursor where you want the audio to appear and then click the Insert Media icon in the toolbar.
- Place cursor on a new line where you want your audio to appear
- Press the Insert Media button in the toolbar
- The Media Library modal window will open.

- First select the Vertical Tab on the left for the type of media you are inserting. In this case it will be the "Audio" tab

- You can now choose toUse an existing audioorAdd a new one to the library
- Find anExisting Audio in the library
- Using the Name filter, type what you think it is called and press "Apply filters"
- You can also use the "Table" view by clicking the icon to the right of the filters, incase the Grid view isn't as helpful
- depending on the view (Grid or Table), click on the audio or check the box next to the audio you wish to insert
- press the "Insert selected" button at the bottom of the modal window
- Using the Name filter, type what you think it is called and press "Apply filters"
- Add a New Audio to the library
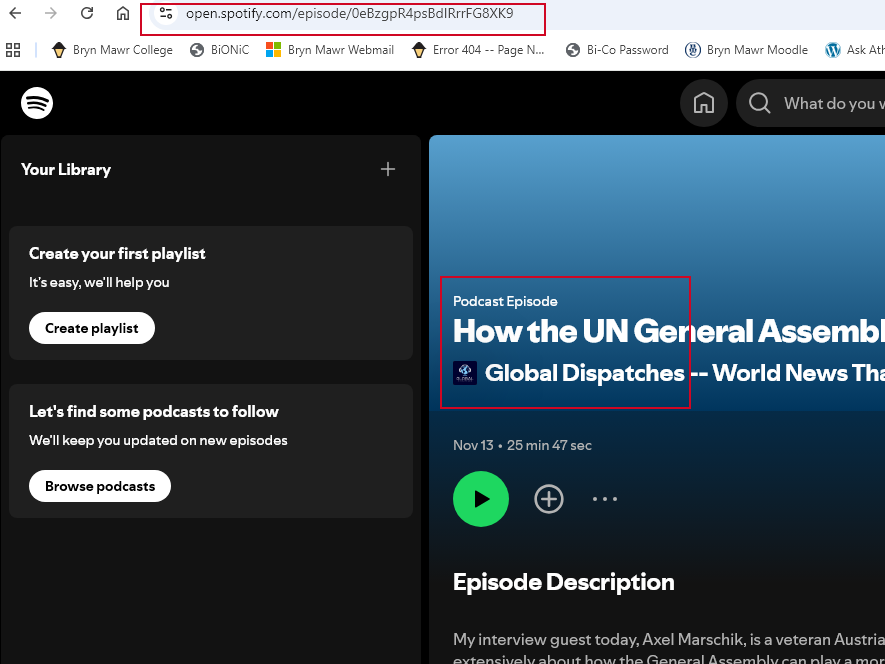
- visit your video on the web. for example, we are going to the Global Dispatches podcast on Spotify and selecting a track to use.
- once there, you can simply copy the URL from the browser address bar
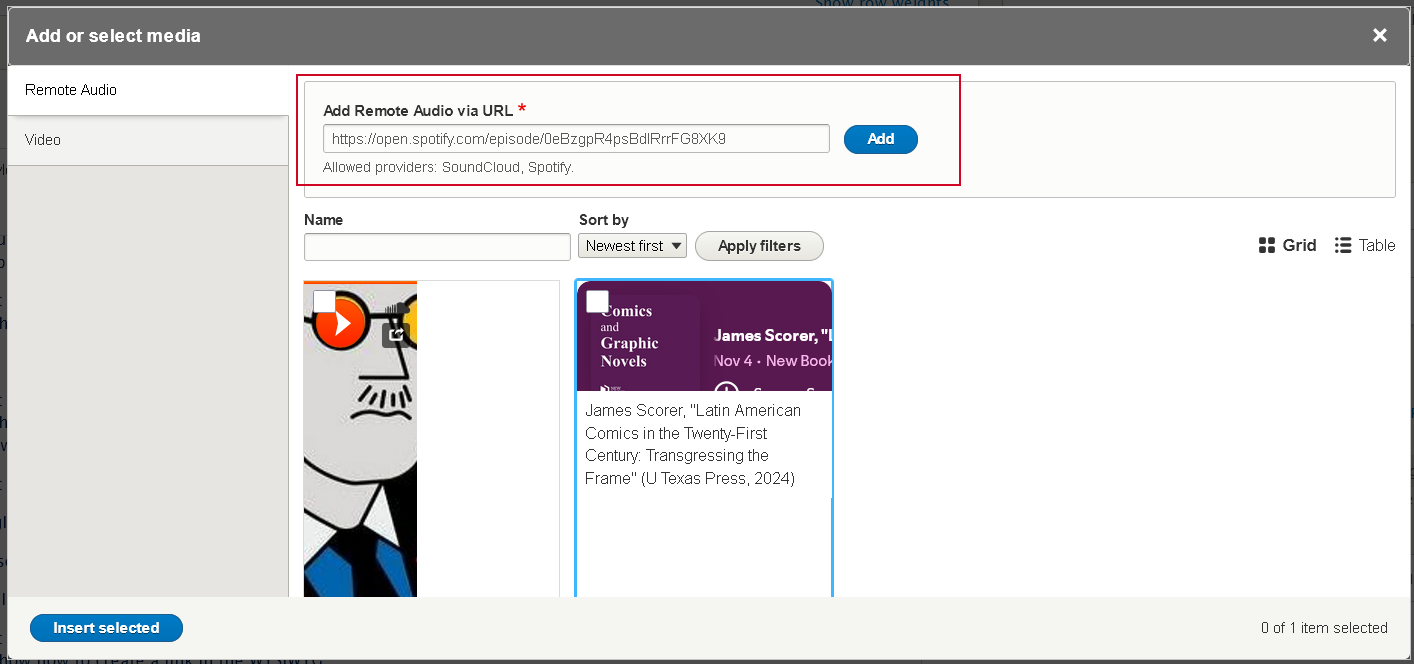
- then, simply paste that URL into the "Add Remote Audio via URL" field and click the blue "Add" button
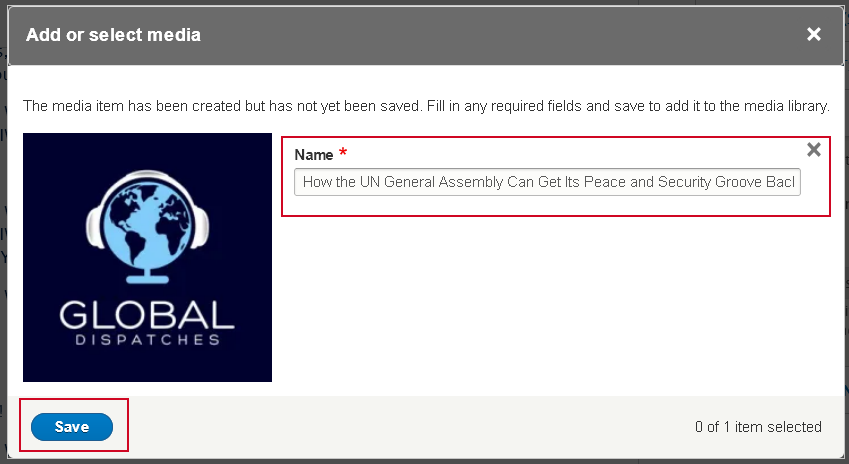
- this will take you to a different modal window that lets you edit the Name field of the Audio. This field is how you will find the audio later in the library.
- once you are satisfied you can click the "Save" button
- this takes you back to the library modal, where you can see that the audio has a check mark on it. This means it is already selected.
- If you are happy that is the audio you wish to select, press the "Insert selected" button
- Find anExisting Audio in the library
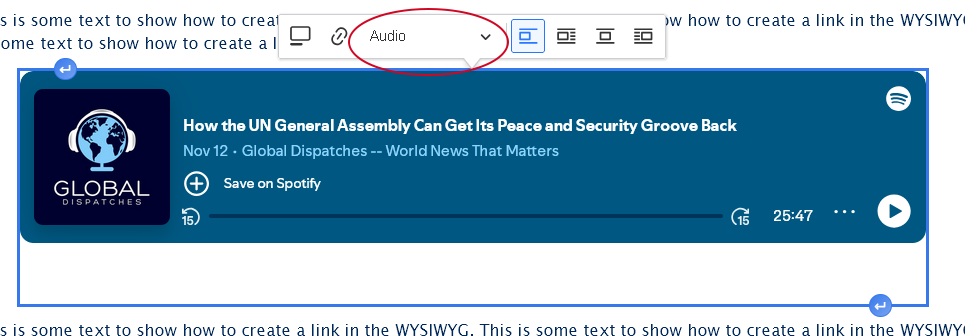
- Once you are back in the editor, you can click once on the audio to make the Audio Dialog appear.
- Check to see that the "Audio" view mode is default selected. This will ensure it displays properly on the page
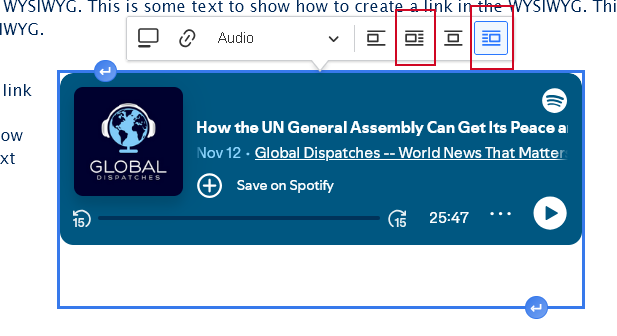
- You can also choose to float the audio to the right or the left, which will then have the text on the page wrap around it.
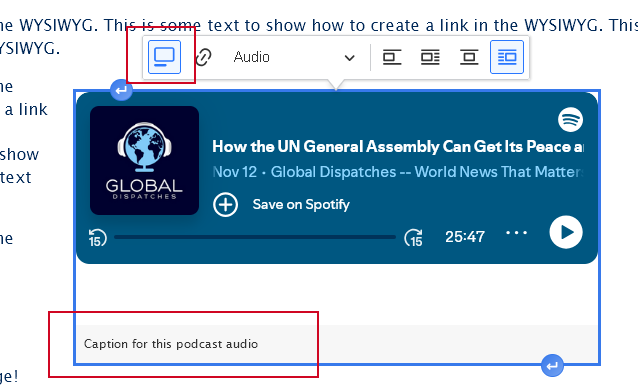
- You can also choose to add a caption to the audio
- Check to see that the "Audio" view mode is default selected. This will ensure it displays properly on the page
- Similarly to an Image, you can use the "Insert Paragraph" before and after buttons that you see if you hover on the audio in order to add content before or after the audio.


Another option to display a video is to have it be part of the Feature Large and Feature Medium Flexible Content Items.
Panopto
The only way to add video from other hosting providers, such as Panopto, is by adding it as an iframe via the Embed Flexible Content Item.
Adding Video via Embed Flexible Content
Note: You must have the Embed role before proceeding.
If you don’t have the Embed role, please contact Communications for help with placing your video.
If you have been granted Embed permissions, you may use these instructions to embed video.
If you don’t have this permission but would like to request it, please reach out to help@brynmawr.edu or communications@brymnmawr.edu for assistance.
Only embed content from known, trusted sites. Ask Web Services if you aren’t sure.
Please use caution and get any code you don't fully understand vetted by Web Services before publishing on the website.
The Embed Flexible Content Item should only be used for specific code-related embedding needs.
It is an extra level of permission. If you don’t have that level of permission, you will see something like this:

If you do have permission to use that Flexible Content Item, you would see a non-WYSIWYG text box appear. In this example, we will have pasted in the WuFoo embed code so a form will appear on the page.
First step is to copy the embed code from the source. Copy the embed code from Panopto (or other video hosting site).
In Panopto, there are a few options to check, if desired.
We care about the captions – so the “Show Captions” box should be checked as the default and viewers can turn them off if they need/choose.
Here’s a link to the Panopto doc with a video tutorial and details on all of the options: https://support.panopto.com/s/article/Embed-a-Video
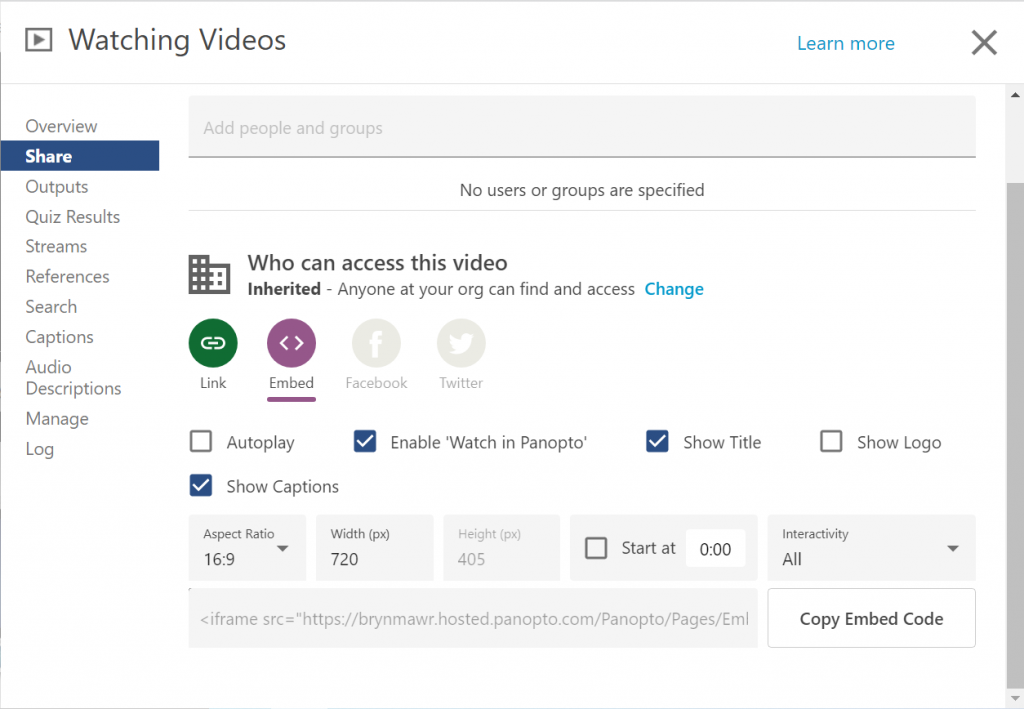 Screenshot example of getting iframe code from Panopto. NOTE: “Show Captions” is checked.
Edit the Drupal page you want to add the video to.
Locate the point in your text where you wish to embed the video. If it is in the middle of the WYSIWYG, you will have to add another WYSIWYG then cut the text that should follow the video from WYSIWYG pre-video and paste into the WYSIWYG that should be post-video.

Then, add an Embed Flexible Content item and paste the iframe code into it.

Drag the Embed to be in between the two WYSIWYG

Save the page to see that the video is displayed as expected.

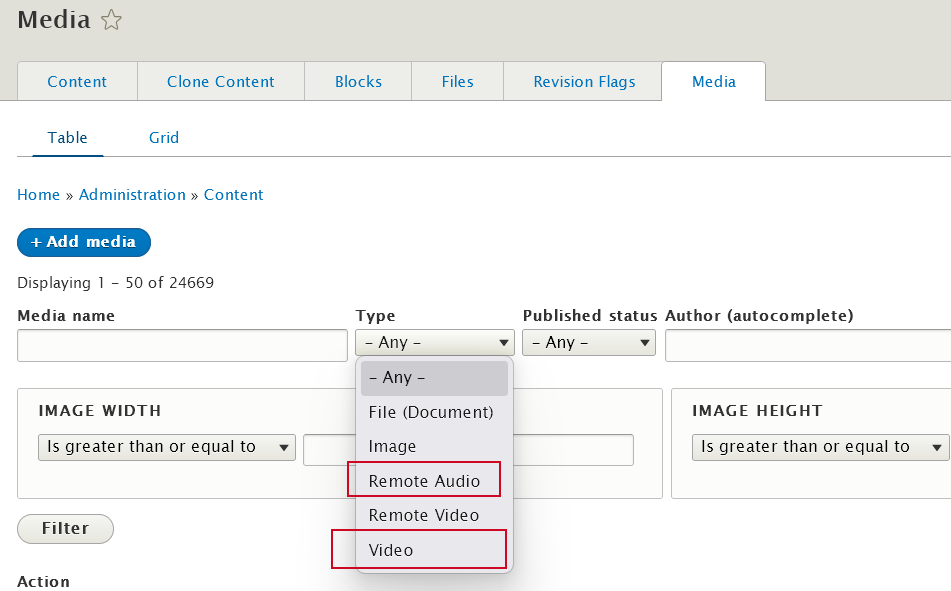
Can’t find your Audio or Video?
Go to Content, select the Media tab and filter by Type= Video or Type=Remote Audio to see all available audio and videos to use in the WYSIWYG.
If after reading this article or watching the training videos you still have questions, we can help! Sign-up for any of our Drupal Drop-ins throughout the year. Schedule a Drupal training session for you or your whole department with our Drupal Trainer. If you have any additional questions or problems, don't hesitate to reach out to the Help Desk! Phone: 610-526-7440 | Library and Help Desk hoursStill need Drupal help? Have more Drupal questions?
Questions?
Email: help@brynmawr.edu | Service catalog
Location: Canaday Library 1st floor
