Public printers can be used to print, copy, and scan by anyone with a College account, including Haverford students and visitors with a visitor account. These printers can be found in computer labs in Canaday, Carpenter, and Collier Libraries; see Computer Labs and Printing for details.
Related documentation about printing and scanning:
Before you start, you will need the following:
- a College account (A visitor account or Haverford account will work.)
Send a print job to the public printers
The public printers are all part of a secure printer group, secure meaning only you can print your documents.
To print at a public printer is a two-step process:
- Send your document as a print job to the public printer group using one of the following methods:
- traditionally print via a computer (Use a computer)
- attach the document to an email (Use email)
- Print out, or release, the document from any public printer (covered in Release a print job below).
Use a computer
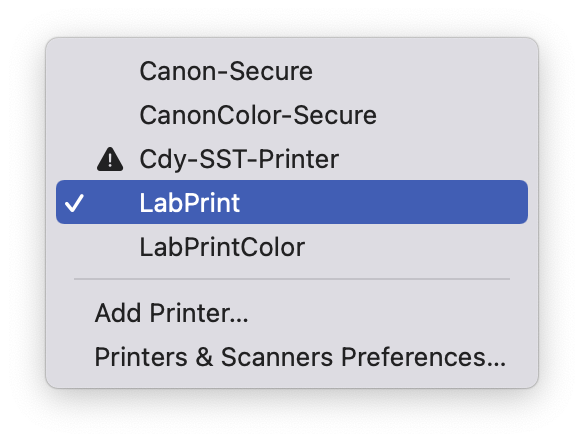
When printing from a computer, two print queues are available to connect to the public printers:
- LabPrint, the black and white queue
- LabPrintColor, the color queue
Select either of these queues, as shown in figure 1.
Attention: You must add a print queue to your computer before you can see it or select it in your print dialog. This doesn't apply if you are using a lab computer; all computers in public labs are connected to LabPrint and LabPrintColor automatically.
Either LabPrint or LabPrintColor can be used to print at any public printer, color or black and white, but keep the following point in mind:
-
To print in color, select LabPrintColor on your computer and release at a color printer.
After selecting a public print queue, click Print to send the document to the printer group. Then release it at a printer.
Tip: Not seeing LabPrint or LabPrintColor in the list of printers?
- Lab computer: Try signing in to another lab computer, restarting the computer, or following the steps to use a College computer.
- Other computer: Make sure you've added the print queue to the computer.
If you're still having trouble, reach out to the Help Desk!
Use email
As of January 17th, 2023 printing via email is nonfunctional. LITS is currently working to restore the service; check the LITS Blog for any updates and please send any questions to the Help Desk!
The following instructions are listed for archival purposes.
Release a print job at a printer
Before you can release, or print out, your document, you must send it to the public printers.
You can print your documents at any public printer. Only you can print documents you sent to the printers; the printer will identify you when you log in with your OneCard or College credentials.
At a public printer, complete the following steps to print your documents:
- Log in to the printer:
Bryn Mawr personnel: tap your OneCard on the panel next to the printer screen.
Haverford personnel and visitors with a visitor account:
- Tap the User Name field.
-
Haverford personnel: enter your Haverford College username followed by
@quaker.haverford.edu.Visitors: enter your visitor account username (including
@brynmawr.edu). - Tap OK.
- Do the same in the Password field with your College or visitor account password.
- Tap Login.
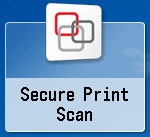
- Tap Secure Print Scan. The button may be labelled Secure Print on some printers.
- Tap Print. A queue of documents you've sent opens.
-
Select the documents you want to print out, then tap Print+Delete, as seen in figure 2. The copier begins printing.
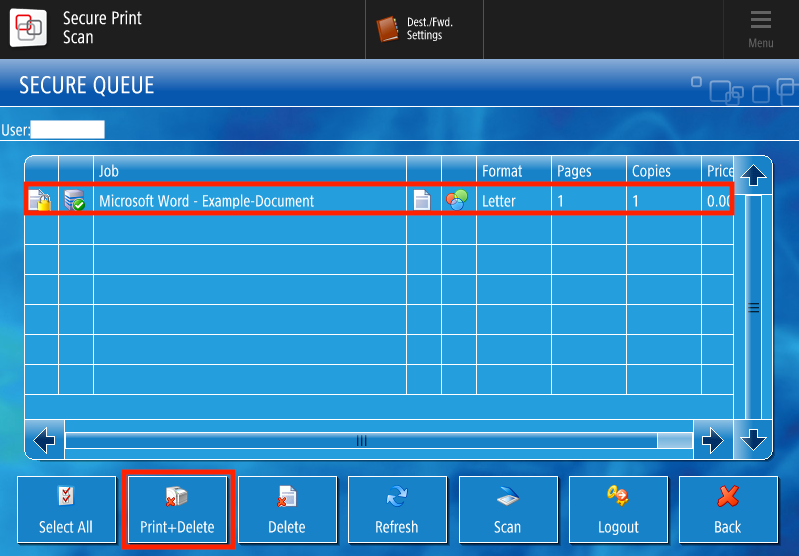
Figure 2. Print jobs will display in your secure queue on the printer. - Tap Print+Delete. The copier begins printing.
- Tap Logout when you've finished. The copier will continue to print.


Add a printer
Before you can send a print job to the public printers from a computer you brought to campus, you need to add the LabPrint and/or LabPrintColor queue to your computer.
Add to personal Windows
- Open the Settings app:
- Open the Start menu (press the Windows key).
- Enter
settings. - Select Settings (app) from the search results.
- Select Bluetooth & devices (or Devices in Windows 10).
- Select Printers & scanners.
- Click Add device (or Add a printer or scanner in Windows 10).
-
Wait for The printer that I want isn't listed to appear. Click Add manually (or simply on The printer that I want isn't listed in Windows 10).
Warning: If you wait long enough, a list of network printers appears. Do not add printers from this list; they will not work.
You can still find the Add manually (or The printer that I want isn't listed in Windows 10) link below the list.
- If prompted, click Yes to allow the app to make changes to your device.
- The Add Printer window opens.
- Choose Select a shared printer by name.
-
Enter the address for LabPrint or LabPrintColor:
Attention: The following addresses use backslash
\characters. The key for these is typically located above Enter.LabPrint:
\\uniflowrsps2019.brynmawr.edu\LabPrintLabPrintColor:
\\uniflowrsps2019.brynmawr.edu\LabPrintColor - Click Next, then click Install Driver if prompted.
- Click Next and then Finish.
- If you are prompted to authenticate to print, enter your College username and password.
Now the print queue will appear in the list of printers your can use to send a document to the printers.
Add to a personal Mac
Warning: Follow the instructions below completely; the final step, authenticating your first print job, is critical.
- In the Menu Bar, select Apple > System Settings.
- Click Printers & Scanners.
-
Click Add Printer, Scanner, or Fax... to open the Add Printer window.
-
If necessary, add the Advanced (two gears) button to the Add Printer toolbar:
Figure 3. The Advanced button must be dragged to the Add Printer window to connect a College printer. Note: The toolbar is the space directly below the Add Printer window title.
-
Open the Customize Toolbar dialog:
-
MacOS 15 Sequoia and earlier: Control-click an empty point in the toolbar (i.e., not an icon in the toolbar), as shown in figure 3, then select Customize Toolbar
MacOS 26 Tahoe: Control-click any of the icons in the toolbar, then select Customize Toolbar
-
-
Drag the Advanced (two gears) button from the Customize Toolbar dialog to the toolbar of the Add Printer window.
- Click Done.
-
-
Click the Advanced (two gears) button. The window loads briefly. - Enter the following information:
- Type: Select Windows printer via spoolss.
-
URL:
smb://will auto-fill. Leave this as-is and enter the print queue's address after it:uniflowrsps2019.brynmawr.edu/LabPrintColor - Name: Enter a name of your choice. We recommend "LabPrintColor" for clarity.
- Use: Select Generic PostScript.
- Type: Select Windows printer via spoolss.
- Click Add.
-
If prompted, select Duplexer, and then click OK.
Warning: The following step is critical to completing this procedure successfully. Read the instructions completely.
- Print a test page. If you are prompted to enter a username and password, first delete any auto-filled text, and then enter your College username and password
- Haverford personnel should enter username@quaker.haverford.edu and their Haverford password.
Now the print queue will appear in the list of printers your can use to send a document to the printers.
Add to a College computer
If you're using a College Windows computer, LabPrint and LabPrintColor are listed as printers in the printer directory, or list of available network printers. If you're using a College Mac, they are listed under Printers in Software Center. You can add these printer groups and departmental printers to your computer by following the steps to use a College computer to print with a departmental printer.
All computers in public labs are connected to LabPrint and LabPrintColor automatically.
Questions?
If you have any additional questions or problems, don't hesitate to reach out to the Help Desk!
Phone: 610-526-7440 | Library and Help Desk hours
Email: help@brynmawr.edu | Service catalog
Location: Canaday Library 1st floor
