Panopto: Record, upload, and edit in your browser (Panopto Capture)
Last Modified on 11/13/2025 12:12 pm EST
This article explains how to create, upload and edit audio and video recordings in Panopto using your web browser. Panopto also has a desktop recording app (see Panopto: Record using the app for Windows or Mac), but the browser recording app, called Panopto Capture, may offer a better experience on Mac computers.
Before you begin, you may need:
- A device with a web browser (and a microphone and camera if you want to capture audio or video)
- A high-speed Internet connection
- An account on Bryn Mawr's Panopto site
Create a video using Panopto Capture
- Log into Bryn Mawr's Panopto site (see Panopto: Get and log into your account if you need help with this).
- Click on Create > Panopto Capture.
- Panopto Capture will open in a new browser window.
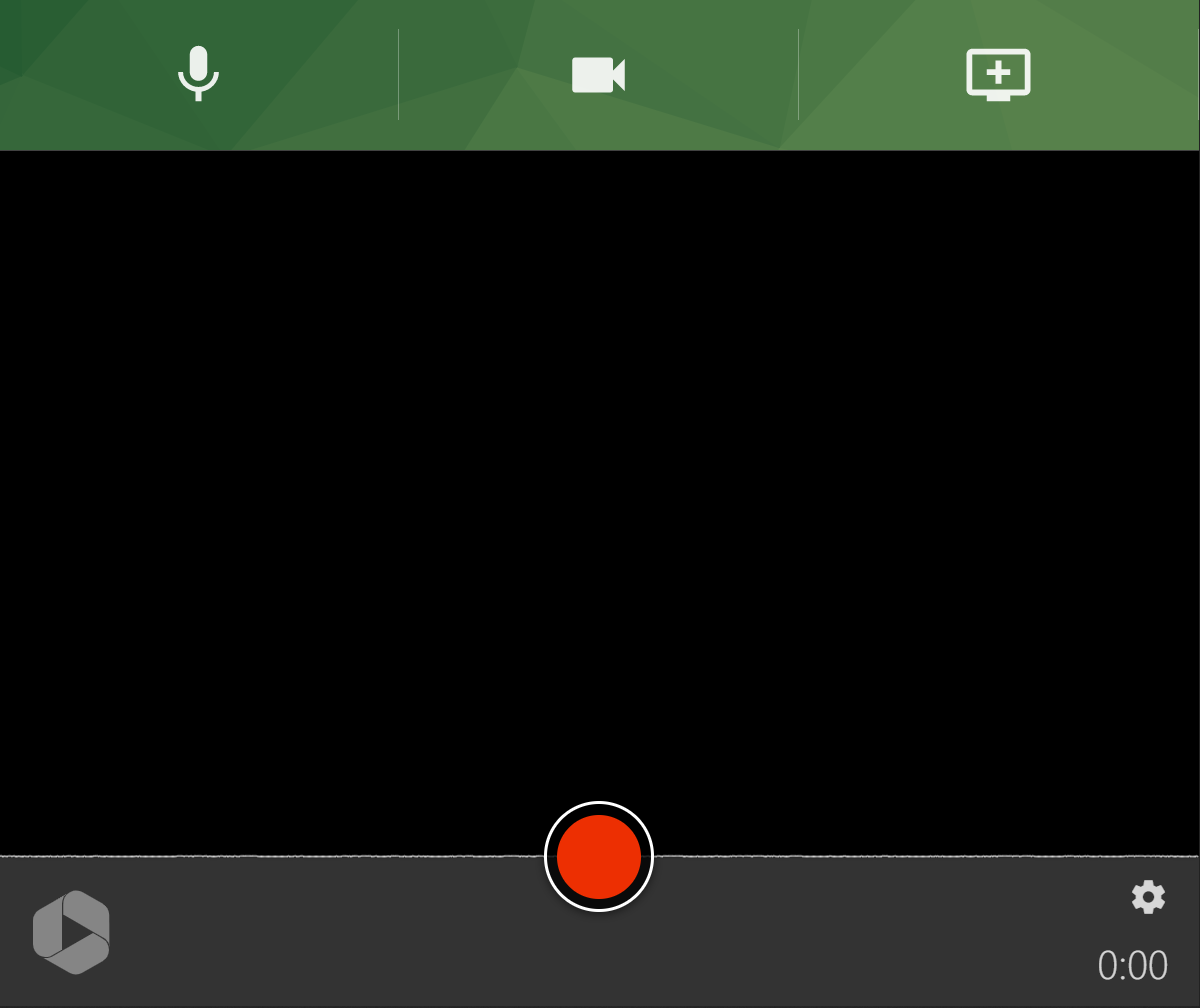
- Click on the buttons for Audio, video, and Screens and Apps to change these settings. Consult Panopto: Add a presentation or web content to a recording and Panopto: Record with multiple video sources if you need help with these features.
- Before you record, click on Settings if you want to change things like screen resolution, outputs, video layout, or your background.
- Once you have configured your settings, press the Record button. To stop your recording, press Record again.
- A new page will open as your video starts processing. If you would like to redo your recording, you can hit Redo or Record New. Otherwise, Panopto will proceed with processing.
- By default, the recording will be stored in your My Folder folder on Panopto (see
How to Use My Folder from Panopto for more details).
- If you would like to change this to a different folder, select the drop down arrow under My Folder and search for the folder you'd like to use.
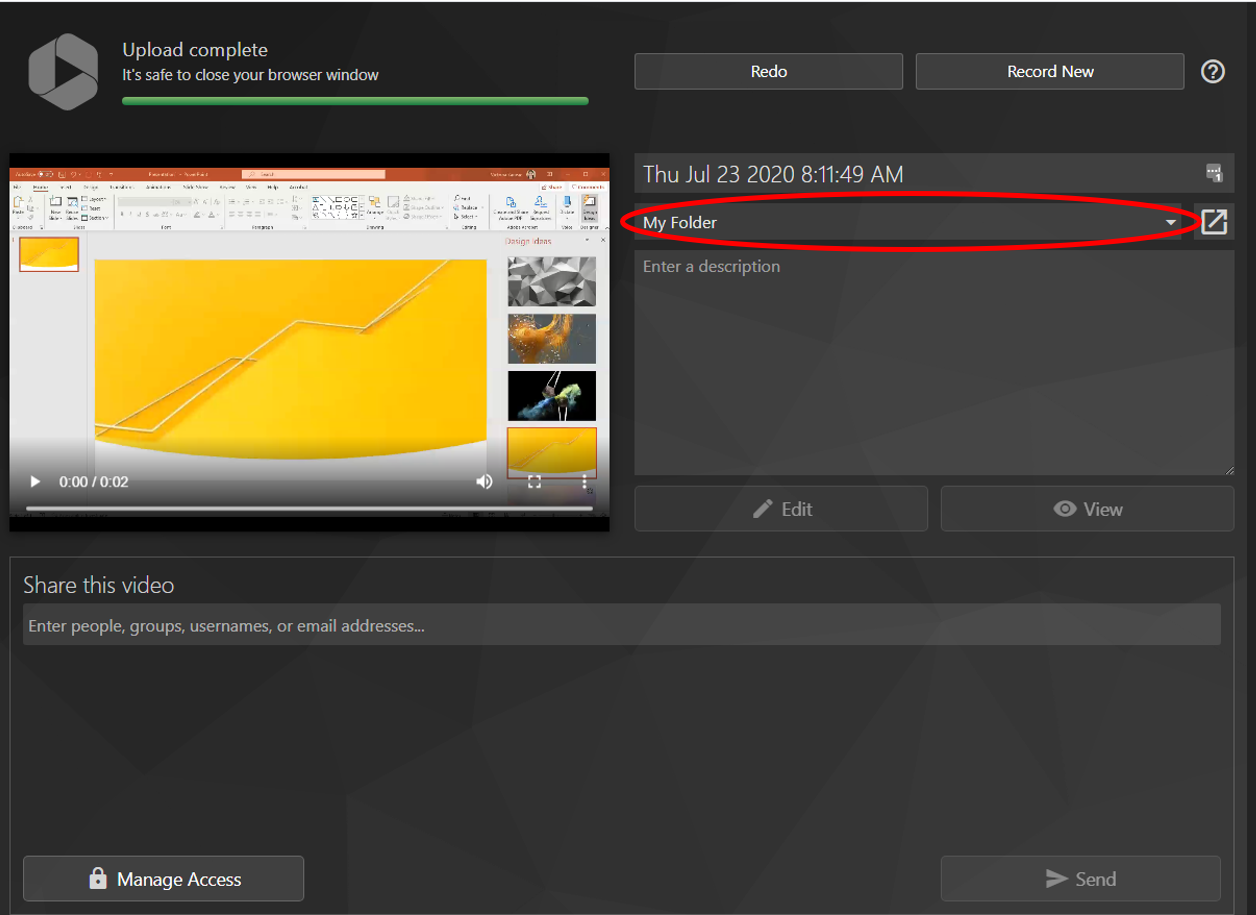
- Once your video is finished processing, you can decide who will be able to access it via sharing settings. See Panopto: Sharing recordings for more information.
Upload a video
- Log into the Panopto and navigate to the folder where you want to upload videos.
- Click + Create.
- Choose Upload media.
- Upload files by dragging them into the box provided or clicking on that box, browsing for files, on your computer and clicking Open.
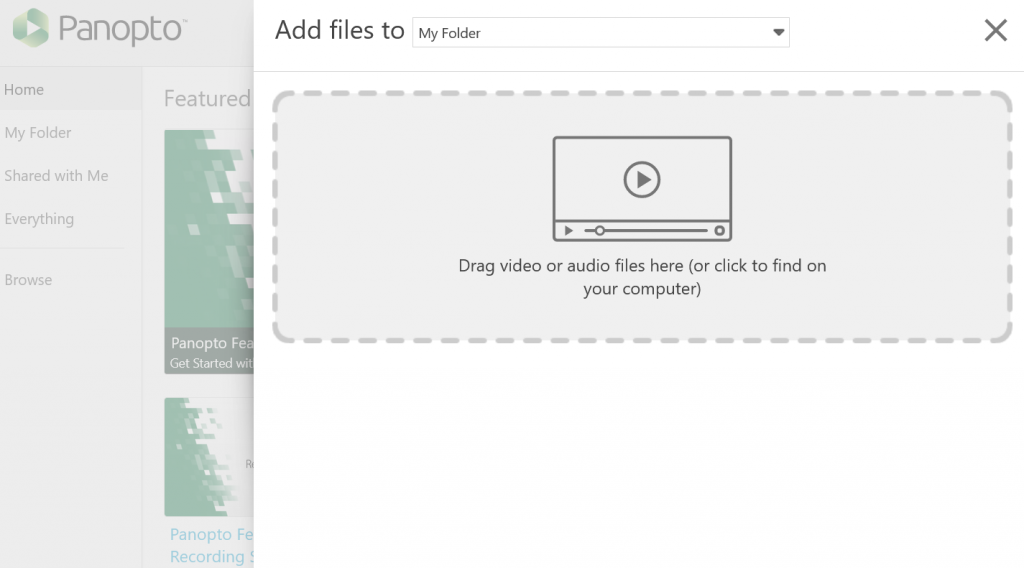
A checkmark will next to each file as it finishes uploading, and Panopto will alert you when it is safe to close the window.
Note: that Panopto will continue processing and adding ASR captions to files after the upload finishes, and you may not be able to edit, move, or copy the recordings until these processes are complete. The exact time required depends on the recording length, file size, media formatting, and server load, but it is often only a few minutes and should not be longer than a few hours for average recordings.
Edit a video
Once you’ve recorded and uploaded a video to Panopto, you may notice things you would like to change. Panopto gives you the ability to make limited edits within its web version.
Trim a Video
- Search for your video and open it.
- Click Edit. The editor will now open in another menu.
- Once the video editor is open, you will see the timeline at the bottom of the screen with a track for each stream included in your recording. These feeds should be designated primary (P1), secondary (S1), and slides (SL). (see Panopto: Record with multiple video sources for more details on this feature
- Click a feed and drag your cursor over a portion of it to select it. You will know which part you selected because it will be highlighted grey.
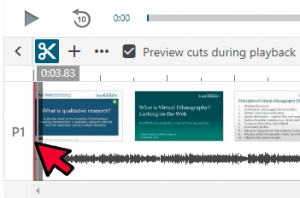 Click Cut . Whatever portion of the feed you selected will disappear.
- Make sure the box next to Preview Cuts during Playback is checked. Click the Play icon to see how effective the cuts are.
- If you like what you see, click Apply to make the changes permanent.

- Panopto will automatically save any changes you make to the video. However, it is essential that you click the blue Apply icon when you are finished editing for your changes to take effect. Otherwise, they will be lost when you close Panopto's video editor.
Panopto will now process your changes. Depending on the length of your video and the number of changes, this may take a longer or shorter amount of time. The page will refresh when processing is done, but you can click See other videos in My Folder if you'd rather not wait.
Note: Panopto allows you to undo cuts. Open your video and click Edit to open the video editor. Select Cuts to see all the ones you made. From that menu, select More actions > Delete.
Other types of edits
Beyond trimming videos, Panopto does allow you to make other minor edits to your video.
- Search for your video and open it.
- Click the Edit button to open the video editor.
- Select whichever of the following options is most appropriate for your task:
Further Reading on Editing in Panopto
Questions?
If you have any additional questions or problems, don't hesitate to reach out to the Help Desk!
Phone: 610-526-7440 | Library and Help Desk hours
Email: help@brynmawr.edu | Service catalog
Location: Canaday Library 1st floor
Videos and Further Reading on Panopto Capture
Questions?
If you have any additional questions or problems, don't hesitate to reach out to the Help Desk!
Phone: 610-526-7440 | Library and Help Desk hours
Email: help@brynmawr.edu | Service catalog
Location: Canaday Library 1st floor


 Click Cut . Whatever portion of the feed you selected will disappear.
