Use Moodle's Grading workflow option for Assignments to hide Assignment grades from students until ALL submissions have been graded (by default, each student can see their own grade as soon as it is entered) or to manage the workflow on assignments that have multiple graders.
Before you start, you need:
- An Instructor of record or Other editing teacher in a Bryn Mawr Moodle course to change Assignment settings.
- One of these roles or a Non-editing teacher role to grade assignments.
Enable grading workflow
Warning: Follow the steps below BEFORE you or anyone else starts grading. You cannot change these settings once grading has started. You can edit these settings while students are making submissions, however.
- Create the Assignment if you haven't already (see Moodle: Create and manage assignments if needed).
- Open Settings page within the assignment.
- Expand the Grade menu.
- Set Use grade workflow to Yes. If there are multiple graders, change Use grading allocation to Yes as well.
- Click Save and Display.
Manage grading status and allocations
Once grading workflow is enabled, all Instructors of record and Other editing and Non-editing teachers (referred to here as "graders") will be able to view and assign grading statuses to submissions. If grading allocation is on, they can also assign graders to submissions.
- Click on the Assignment to open it.
- Navigate to the Submissions tab
- If desired, use the filters in the top section to narrow down the visible submissions (Filter by name, status, or use the Advanced menu options).
- Make sure the Quick grading box on the right side is checked. If you do not check this box, the drop down menus for the States and Grader column will not appear.
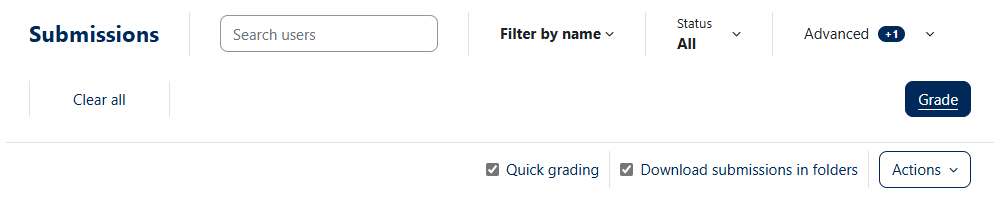
- Within the submissions table, use the drop-down menu in the Status column to change a submission's Grading status:
- Choose Released to make a submission grade and feedback visible to the student who submitted it (see What Students See).
- All other Grading statuses (Not graded, In grading, Grading completed, In review, Ready for release) are visible to students when they look at the assignment page. However, none of them will allow a student to see their grade.
- If grading allocation is enabled, a Grader column appears
- If Grading status is Not graded or In grading, click the Choose menu in the Grader column to assign a submission to yourself or another grader.
- For any other Grading status, the Grader assignment cannot be changed. This is true even if you didn't assign a grader.
- Grader assignments are NOT visible to students (see What Students See).
- After changing grader assignments, click Save to apply your work.
Change grading status or allocations in bulk
- Click on the Assignment, then click on Submissions.
- If the Status and Grader columns in the Submissions table are not editable, check the Quick grading box.
- In the Select column:
- Check the select all button OR
- Check the boxes next to each submission you want to change (selections will be highlighted in yellow)
- Find the Bulk actions > More. From there, select one of the following:

- Change marking state to edit the Grading status.
- Allocate Marker to change the Grader
Both of these options will take you to a different screen, so make sure other changes are saved first before you select them.
Note: You can also use this menu to select Extend deadlines, Message students, or Upload feedback if you had downloaded the Moodle grading worksheet (see Moodle: Download assignment to grade offline for more information)
- Update your Grading workflow state or Allocated grader as needed.
- Click Save changes.
Manage grading using Groups
If you have set up Groups for your course you can use them to manage and allocate grading.
- Open the Assignment and go to Settings.
- Expand the Common modules settings menu.
- Change the Group mode to Visible groups.
- Click Save and display.
- In the assignment, go to Submissions.
- There will be a new Visible groups menu. Select a group to display only the students in that group.
- Check the Select all button or the buttons for the submissions you want to allocate.
- Select More > allocate grader.
- You will see a list of the students you selected, in a pop-up menu. Choose the appropriate Allocated grader
- Click Save changes.
What students see
When students open an Assignment, they see a Submission status table with information about the assignment deadline (if set), whether and when they submitted work, and a Grading status.
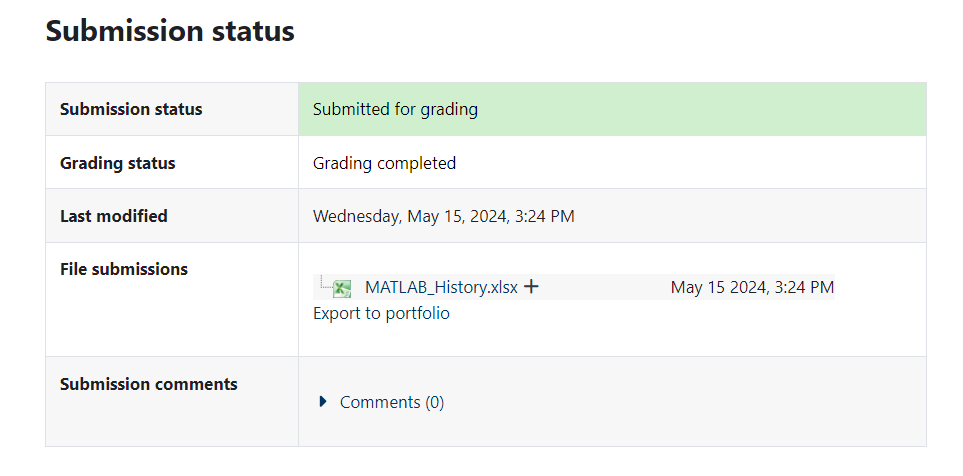
- If Grading workflow is not enabled, the Grading status displays Not Graded if no grade has been entered or Graded with the grade and feedback.
- If Grading workflow is enabled, the Grading status displays the status a grader has chosen in the View Submissions table
- When a grader changes the Grading Status is changed to Released, the grade and feedback will also become visible.
- Grader assignments are never visible to students.
Questions?
If you have any additional questions or problems, don't hesitate to reach out to the Help Desk!
Phone: 610-526-7440 | Library and Help Desk hours
Email: help@brynmawr.edu | Service catalog
Location: Canaday Library 1st floor


