This article describes the best practices you can adopt to ensure Word documents you create and share can be read by everyone, including individuals who use assistive technologies, such as screen readers, text-to-speech, or Braille devices.
Prefer video? See Microsoft's Create accessible Word documents series
Use the accessibility checker
Microsoft Office has a built-in accessibility checker that can scan documents, flag potential problems and recommend actions you can take to fix them.
Prefer video? See Microsoft's demo on how to check document accessibility
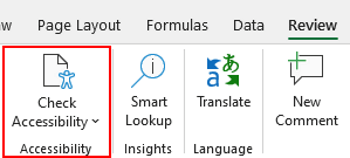
- Click the Review tab of the ribbon, then click Check Accessibility.
- Word will list potential problems in the Accessibility pane. Click on a issue to see more information and highlight the object or place in the document where the issue occurs.
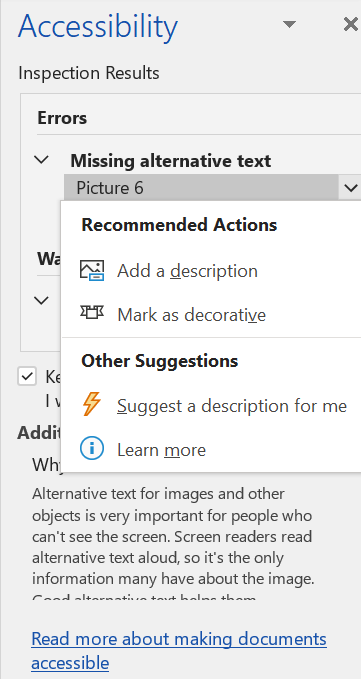
- Click one of the Recommended Actions, if available, to fix the issue or Learn more for an explanation and possible remedies.
- Check the Keep the accessibility checker running while I work box to add an Accessibility button to the status bar at the bottom of your Word window.
- This button will flag you when issues appear in documents you open; click it to open the Accessibility pane and fix them.

Add headings using built-in styles
Creating headings with Word's built-in heading styles (e.g., Heading 1, Heading 2) formats the text for easier visual scanning and adds an outline that assistive technologies use to infer reading order. Headings help all readers navigate within documents, but they are especially important for readers using formats in which pagination is absent or varies.
Prefer video? See Microsoft's Apply Styles demo.
- Select the text you want to format.
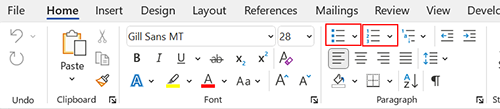
- Click the Home tab in the ribbon to display it.
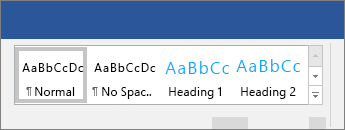
- Scroll through the Styles gallery and choose a heading style (if you don't see the one you need, you may need to expand the gallery).
- Repeat, using different heading levels to outline your document:
- The document's title/main heading should be Heading 1.
- Titles of sections should start be Heading 2. Sub-sections will have Heading 3 titles, sub-sub-sections Heading 4 titles, and so on.
- Don't skip heading levels or use heading levels out of order as this can make the document inaccessible; assistive technologies use the outline for navigation and to infer reading order.
- Open the Navigation Pane to see your headings in outline form, increase or decrease heading levels, and reorder sections.

- (Optional) customize the formatting of the built-in heading style if you want to change how it looks. (Don't rename built-in headings, however, as this could prevent some software from accurately recognizing heading levels.)
Note: When you convert a Word document to a PDF or a web page, Word automatically converts text styled with built-in heading styles to the appropriate tags (e.g., <h1>, <h2>) in those formats to maintain accessibility. Applying styles in Word before converting a document to a PDF or HTML page is usually much faster than trying to add the tags after the fact.
Create lists using built-in tools
Lists assist reader comprehension by breaking up text and making it easier to visually scan and by adding information about order or hierarchy. Creating lists using Microsoft Word’s built-in tools ensures that assistive technologies recognize them as lists and supply the additional information to readers using these tools.
Prefer video? See Microsoft's Create a list demo
- Create lists with Autoformat: Type a 1. (one followed by a period) or an * (asterisk) followed by a space or tab and some text, and Word will automatically start a numbered or bulleted list.
- Create lists using menu options: Select the content of your list or click where the list will begin, then click the Home tab in the Ribbon and choose the bulleted or numbered list option,
Use meaningful text for hyperlinks
When adding hyperlinks to a document, use "link text" or "display text" (that is, the part of a hyperlink that is visible onscreen and underlined or formatted to show it can be clicked) that briefly describes what happens or is visible when the link is clicked.
Prefer video: See Microsoft's guide to creating accessible links.
- Type the text that you want to make a hyperlink.
- Don't use the URL as the link text. URLs are hard for assistive technologies to parse and disruptive when read aloud (character by character!) for readers using text-to-speech technologies.
- Avoid repetitive or vague links, such as "click here." Assistive technology users don't always have the text surrounding a link for context; for example, they might navigate to a link by choosing it from a list of all links in the document.
- Highlight that text and right-click () or press Control and click () to open the context menu.
- Choose Link.
- Word will show a list of recent files for you to choose from; click Link or Insert link ... to add a URL instead.
- The text you've highlighted will show up in the Text to display or Display text box; paste the URL in the Address or Enter link field, then click OK or Insert.
Note: If you need to make a URL visible within a text -- for example, to share a DOI name/link as a reference -- place it in a note or footnote where it won't interrupt the flow of the text and use human-readable phrases for links embedded in the main body of your document.
Add alt text for images
Alternative text, or alt text, provides a description of an image for screen reader users and appears in place of the image if it cannot be rendered properly.
Prefer video? See Microsoft's Improve accessibility with alt text demo
- Right-click (Windows) or Control-click on the image to open the context menu.
- Select Edit Alt Text.
- In the Alt Text pane:
- Type a description of visual information that is essential to a reader's understanding and not already conveyed in the text
- OR check Mark as decorative if the image does not convey essential information
Use tables wisely
Tables can help many readers visually process information, but they present considerable challenges for assistive technology users. Readers who need to magnify screens, increase font size, or who view on a tablets may need to scroll horizontally and vertically to see everything. Screen readers and Braille display technologies present tabular information by numbering cells in columns and need metadata explicitly defining the relationships between headers and data cells to do this accurately.
- Don't use tables as layout tools for aligning text and graphics. Use Word's paragraph formatting, styles and picture tools instead.
- Remove blank rows and columns and fill blank cells with an appropriate null value, such as zero or NA.
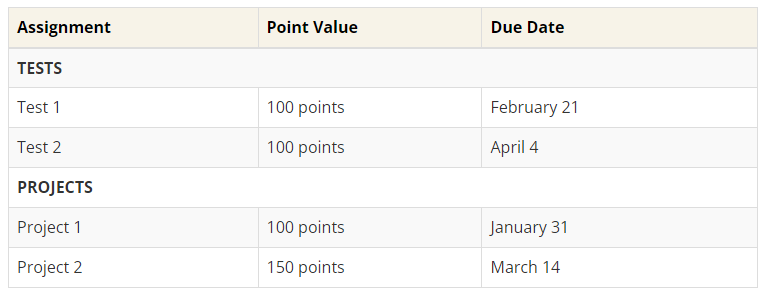
- Include a single header row that states what kind of data is included in contained in each column. For example, the first row of in the three-column table pictured below, contains the column headers Assignment, Point Value, and Due Date, which describe the data in those columns.
- Designate it as a header row so that Word adds metadata for screen readers and other assistive technologies. In the example below, Word applied a bold text and yellow background to the header row, but regular text and gray or no background to non-header rows.
- Use a simple, regular table structure without split or merged cells, multi-row headers, or nested tables. In the table shown below, the merged cells used to create TESTS and PROJECTS sub-headings in rows 2 and 4 would interfere with the numbering that screen readers use to associate the data cells with the proper column. Deleting these rows (which are redundant since the assignment names Test 1, Test 2, Project 1 and Project 2 contain the same information) creates a simple table that a screen reader can parse.

Identify document language(s)
Assistive technologies need to know what language a document or text is written in to properly encode or present it.
- If you write in a single default language that Office uses spelling and grammar checking tools your documents will be encoded in that language.
- If you write in multiple languages, set the language for the text passages within your document so assistive technologies (and Word's spelling and grammar checking tools) can identify them:
- Select the text in a language.
- Click Review, then click Language
- Choose the appropriate language from the list and then click OK
- Repeat for each passage in a different language.
Attention: These language settings do not carry over when a Word document is saved as a PDF. You will need to set the document language for the PDF using Adobe Acrobat Pro.
Questions?
If you have any additional questions or problems, don't hesitate to reach out to the Help Desk!
Phone: 610-526-7440 | Library and Help Desk hours
Email: help@brynmawr.edu | Service catalog
Location: Canaday Library 1st floor
