This article reviews how to install and connect to the College's VPN software.
Warning: You cannot use the VPN to access any region-locked content or bypass internet censorship.

What is the College VPN?
The College VPN allows Bryn Mawr College community members to access resources from off-campus that are otherwise only available on-campus, such as the College network drives.
The College VPN application is called Palo Alto GlobalProtect, and is configured with these settings:
- Stay connected for up to 9 hours at a time
-
Automatic logout after 60 minutes* of inactivity
*A warning message will appear after 50 minutes.
Uninstall the old VPN
If you have the College's previous VPN installed (Ivanti Secure Access or Pulse Secure), it will need to be uninstalled.
Windows
macOS (College-owned)
macOS (Personal)
macOS (Personal) — Optional deep clean
Install: automatic
College computers can use Software Center to install GlobalProtect automatically!
Attention: If the following process fails, follow the manual installation instructions instead.
Windows via Software Center
Off-campus? Follow the manual installation instructions instead!
- Open Software Center
- Click
GlobalProtect - Per-system unattendedand click Install - Wait some time for GlobalProtect to install
Optional: Add GlobalProtect to the Windows taskbar
- In the bottom-right corner of your desktop, click the up caret to open the system tray
- Click-and-drag the globe icon to the taskbar (such as next to the network icon )
macOS via Software Center
- Open Software Center
- In the left-hand menu, click Browse > Security & Encryption
- Find
Palo Alto GlobalProtect VPNand click Install - Wait some time for GlobalProtect to install
Install: manual
Manual installations works for personal and College computers, whether you're on or off-campus!
Windows
- Open Google Chrome
- Navigate to https://vpn-01-in.brynmawr.edu/
- Log in with your College email and password
- Click Download Windows 64 bit GlobalProtect agent
- Run the downloaded
GlobalProtect64.msifile - Click Next > Next > Next > Yes > Close
macOS
- Open Google Chrome
- Navigate to https://vpn-01-in.brynmawr.edu/
- Log in with your College email and password
- Click Download Mac 32/64 bit GlobalProtect agent
-
Run the downloaded
GlobalProtect.pkgfile - Click Continue
- Select the checkboxes for GlobalProtect and
GlobalProtect System extensions
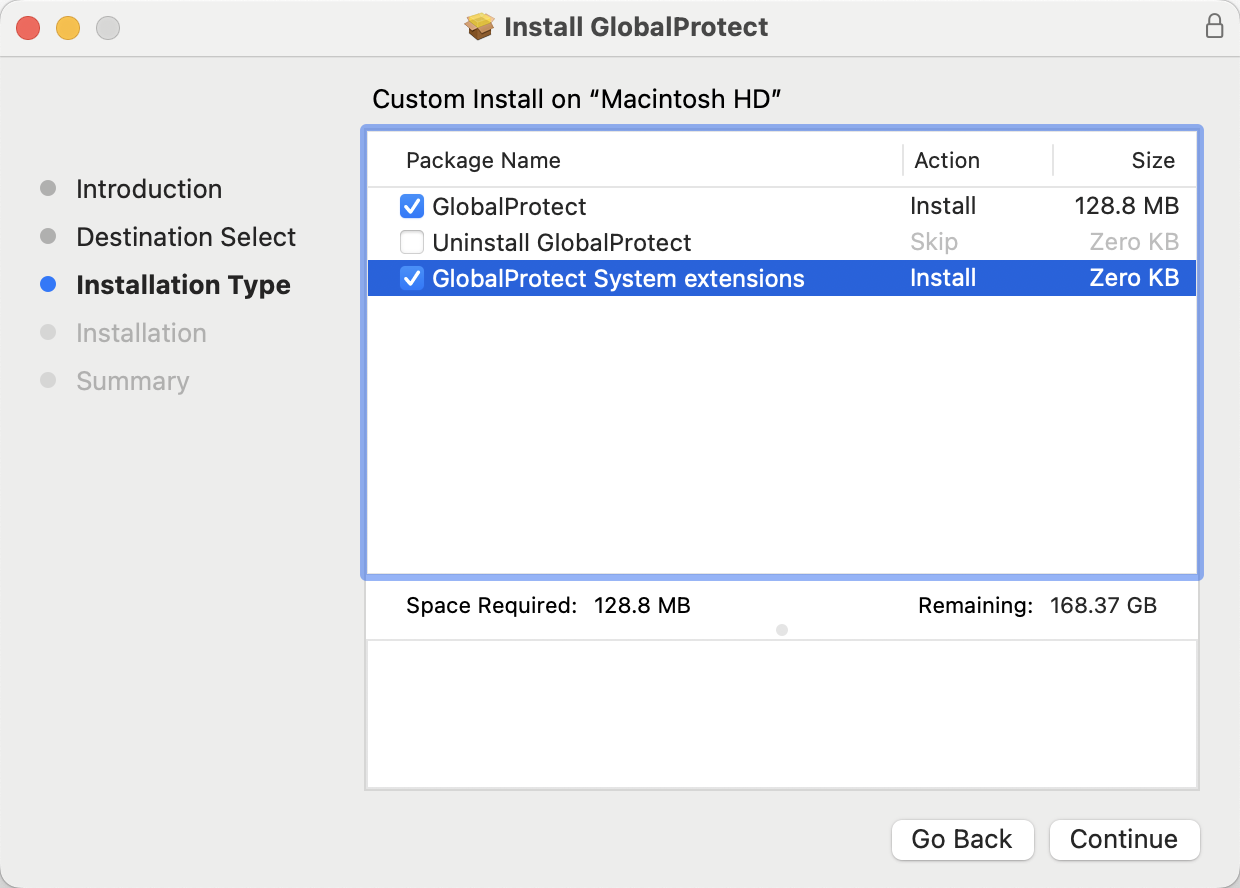
- Click Continue > Install
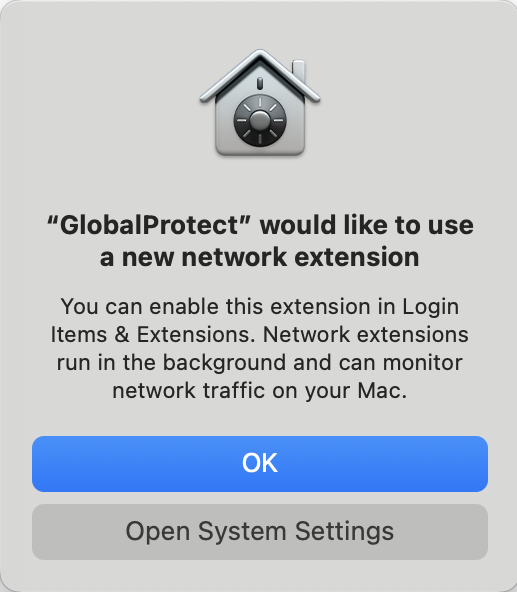
-
Click Open System Settings
Attention: You may not see this window. If that is the case, GlobalProtect has finished installing!
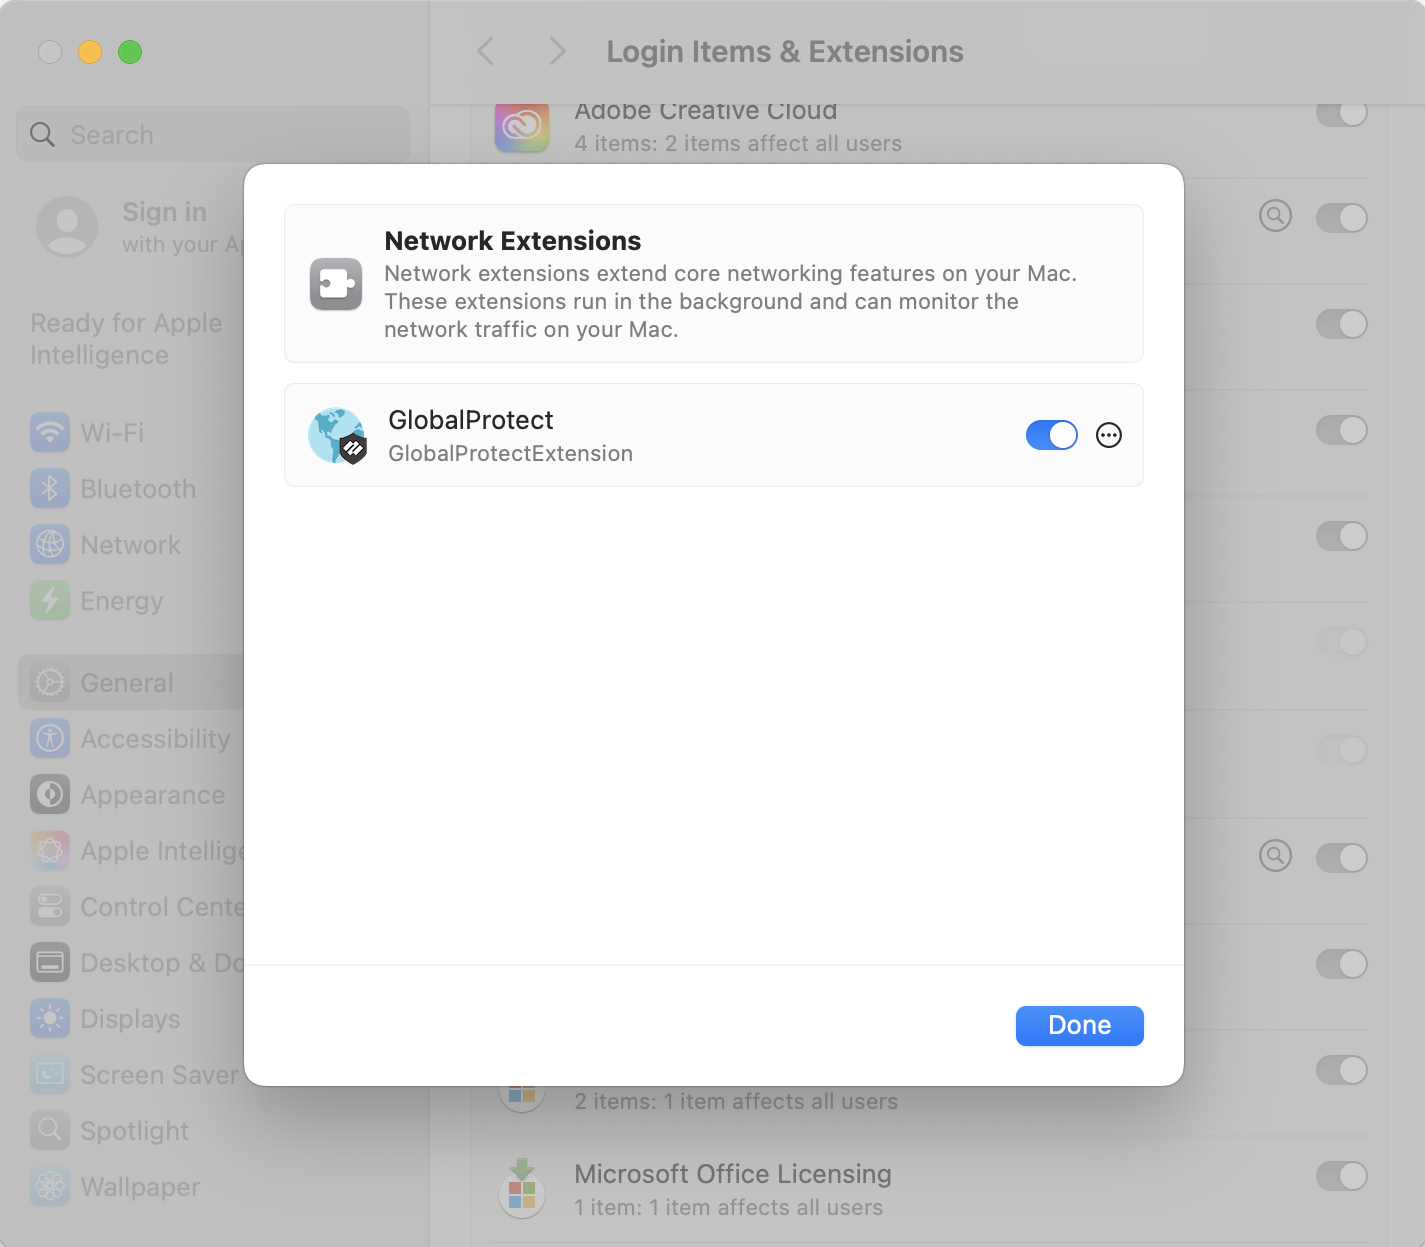
-
Click the switch next to GlobalProtect to toggle it on , and click Done


Connect
- Open GlobalProtect
- Windows (): Click the Windows Search bar and type in
GlobalProtect - macOS (): In the menu bar (top-right of your screen), click the globe icon
- Windows (): Click the Windows Search bar and type in
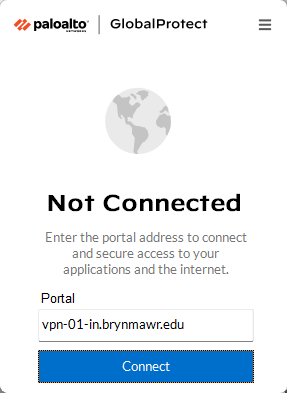
Attention: First time connecting?
- Click Get Started
- In the Portal field, type in
vpn-01-in.brynmawr.edu
-
Click Connect

Attention: If your default browser doesn't open, you may need to change your .HTML file association.
Windows

macOS

- Type in your College email and password
- Wait until GlobalProtect is connected


Troubleshooting
If you are having trouble connecting to the VPN, please remove and re-add the connection:
- Open GlobalProtect
- Click the menu icon
- Click Settings
- Under "Manage Portals", click
vpn-01-in.brynmawr.eduand click the trash icon
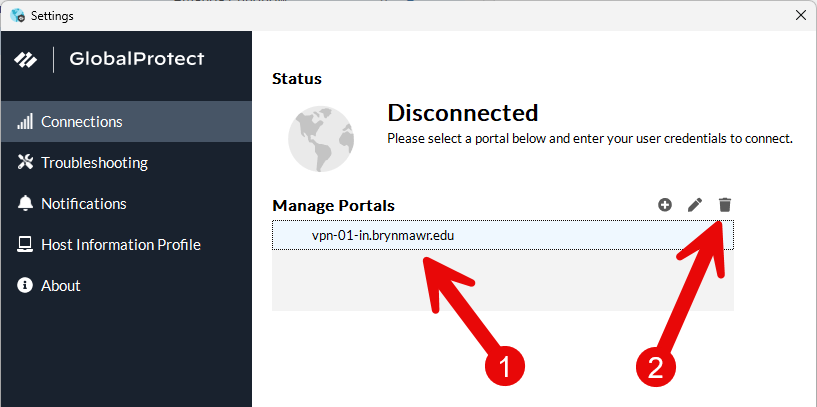
- Click Delete and close the window
- Open Global Protect
-
In the Portal field, type in
vpn-01-in.brynmawr.edu - Retry connecting to the VPN

Questions?
If you have any additional questions or problems, don't hesitate to reach out to the Help Desk!
Phone: 610-526-7440 | Library and Help Desk hours
Email: help@brynmawr.edu | Service catalog
Location: Canaday Library 1st floor
